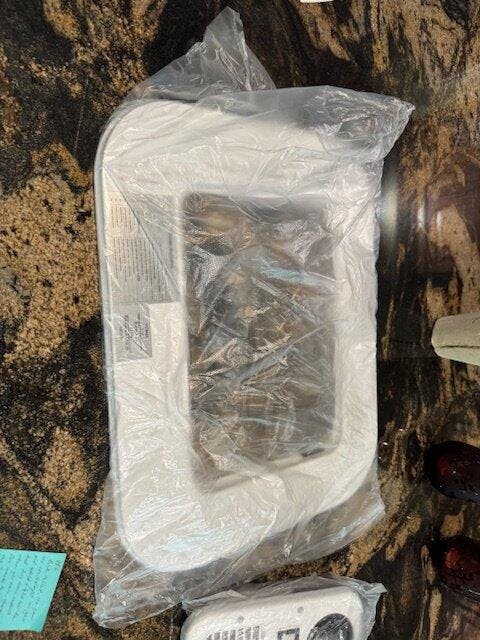


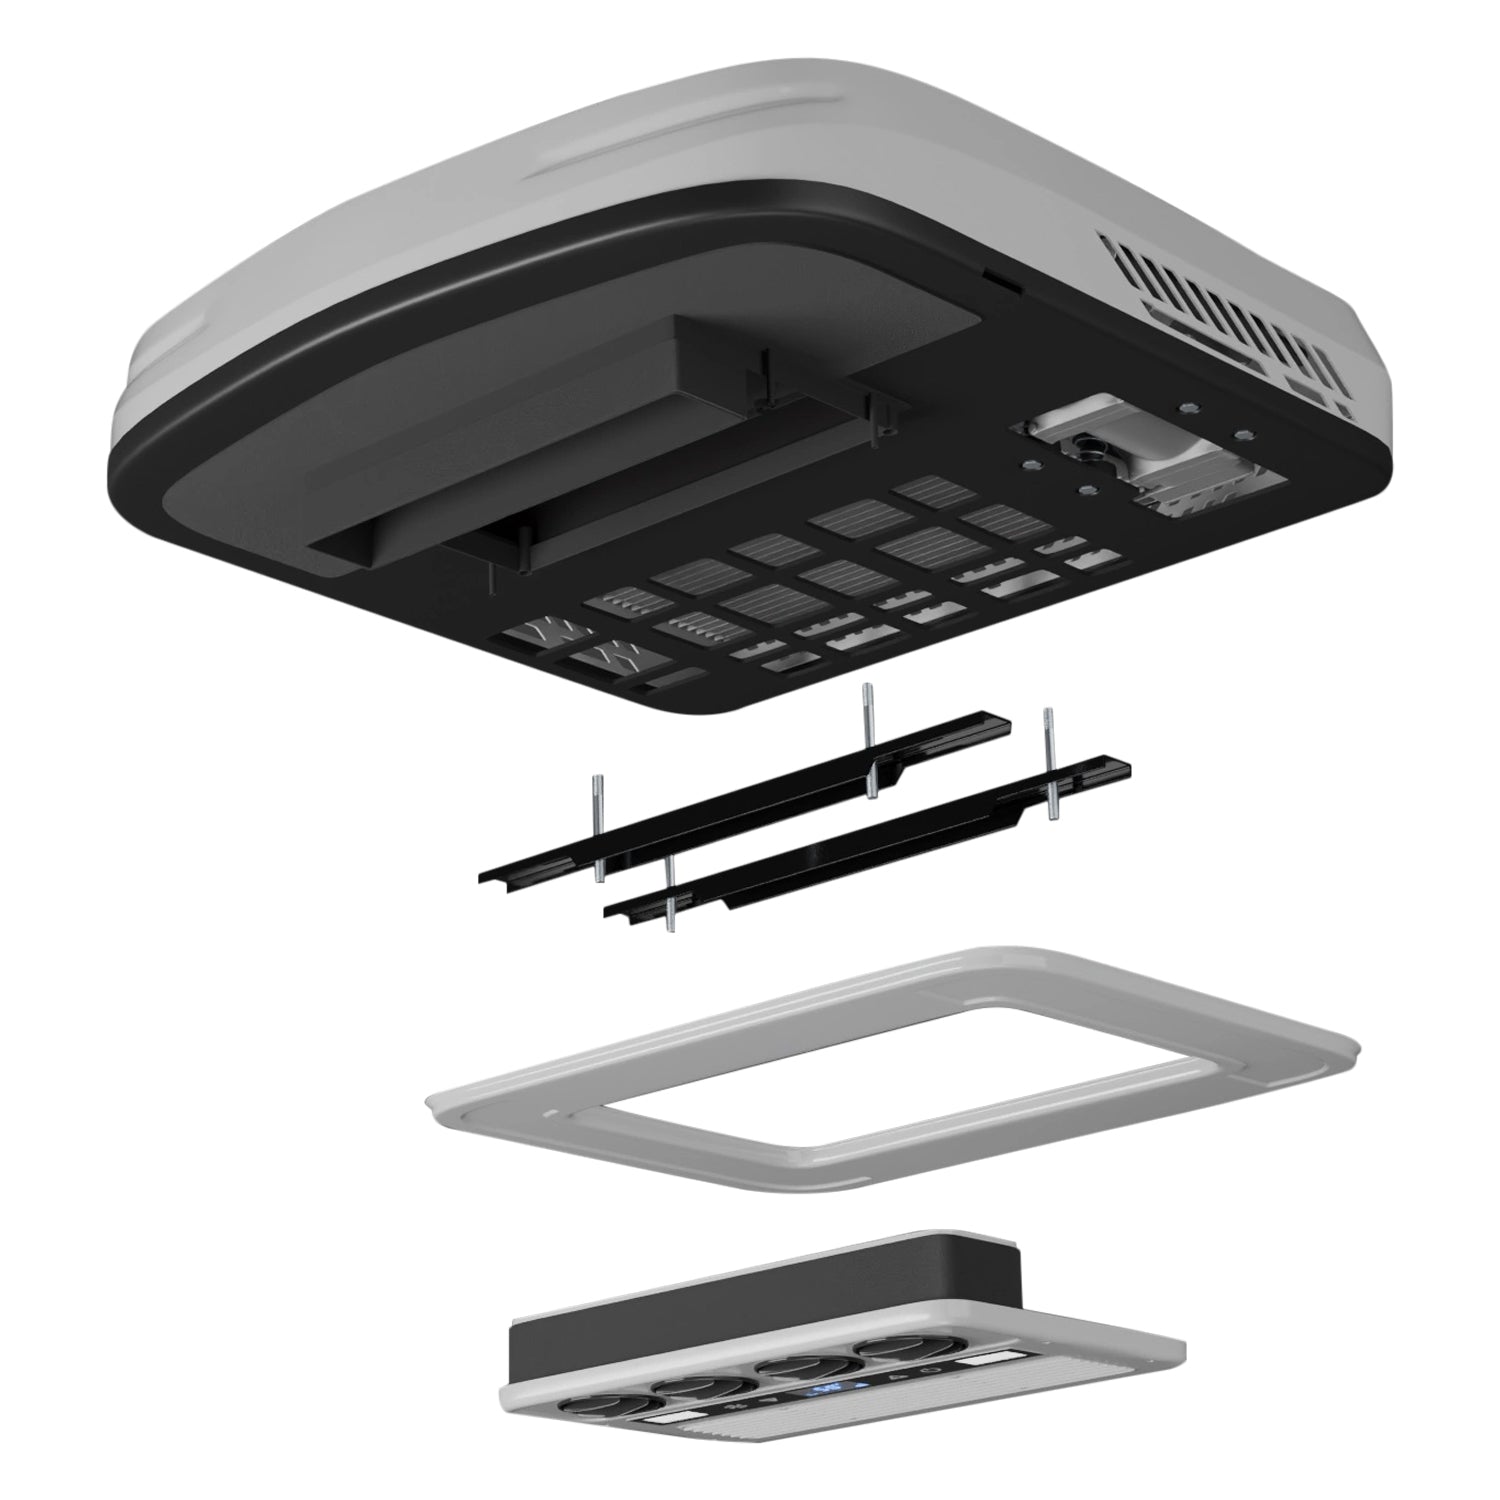

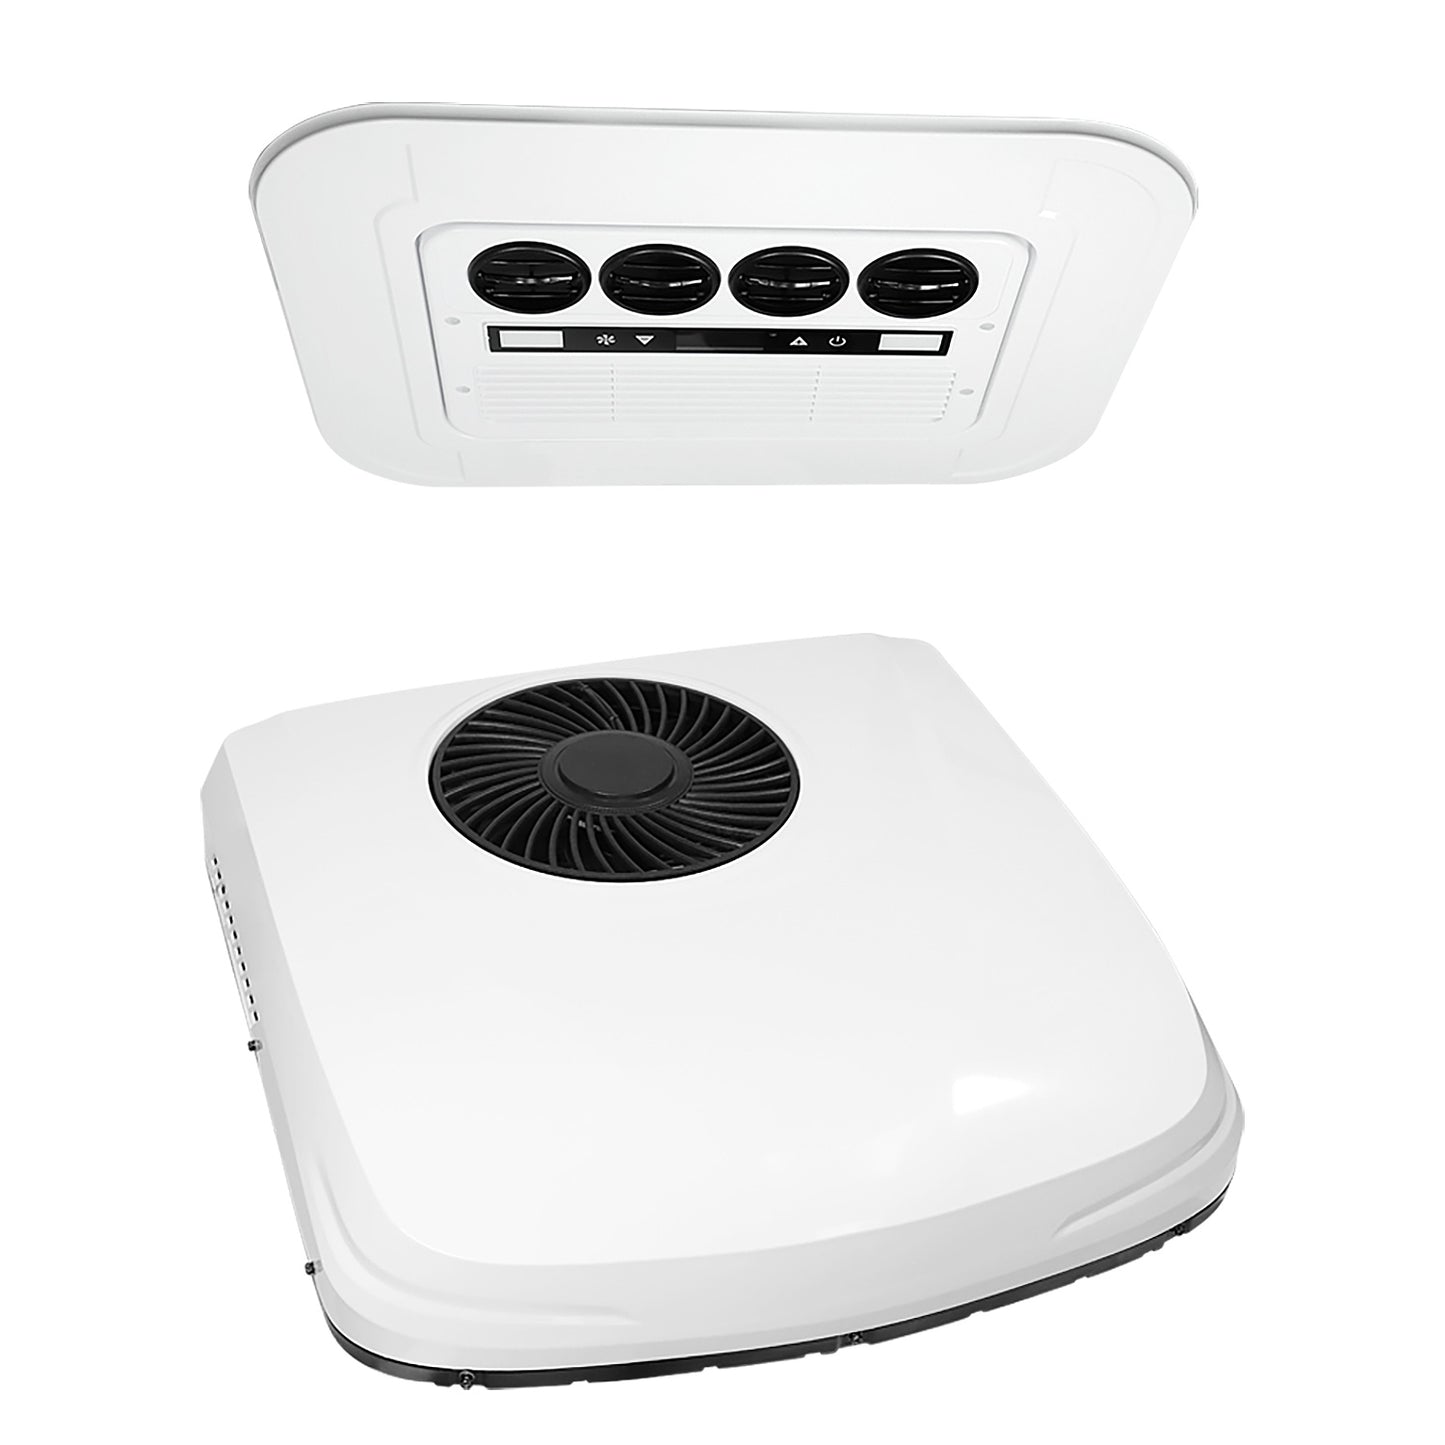


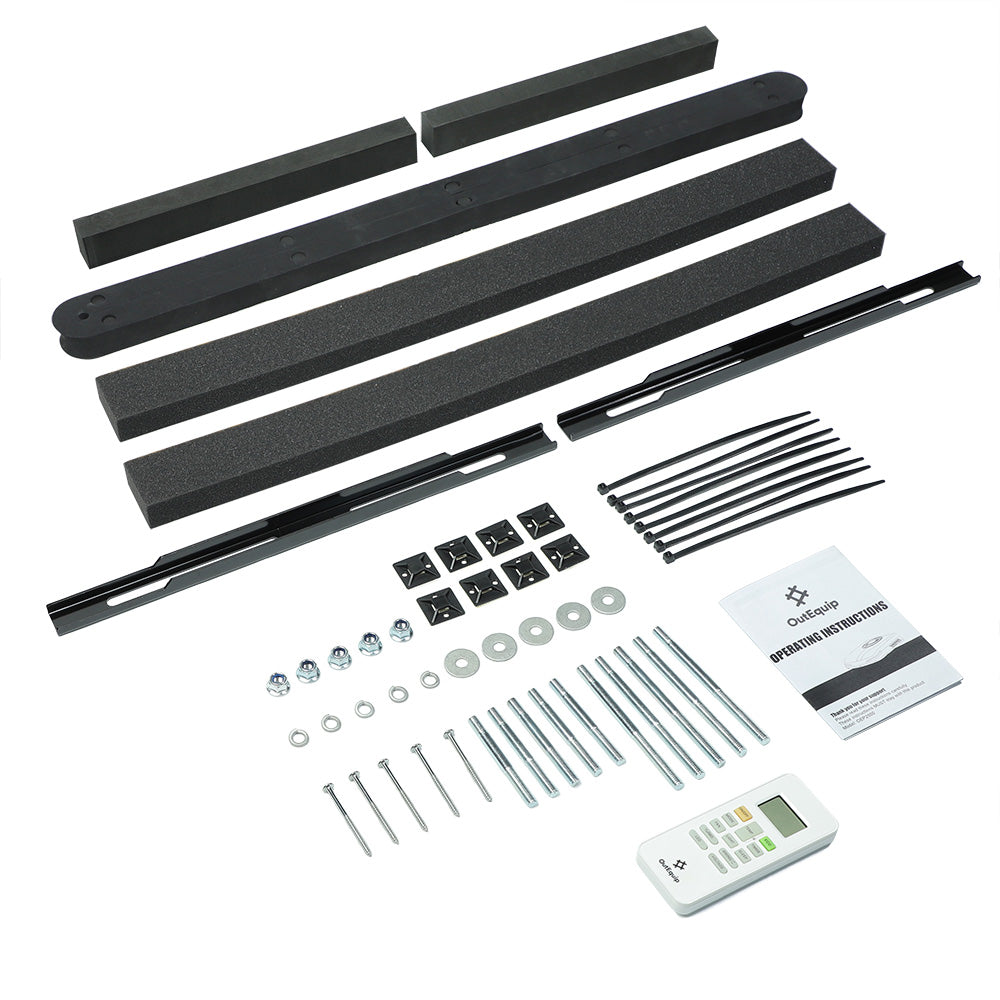

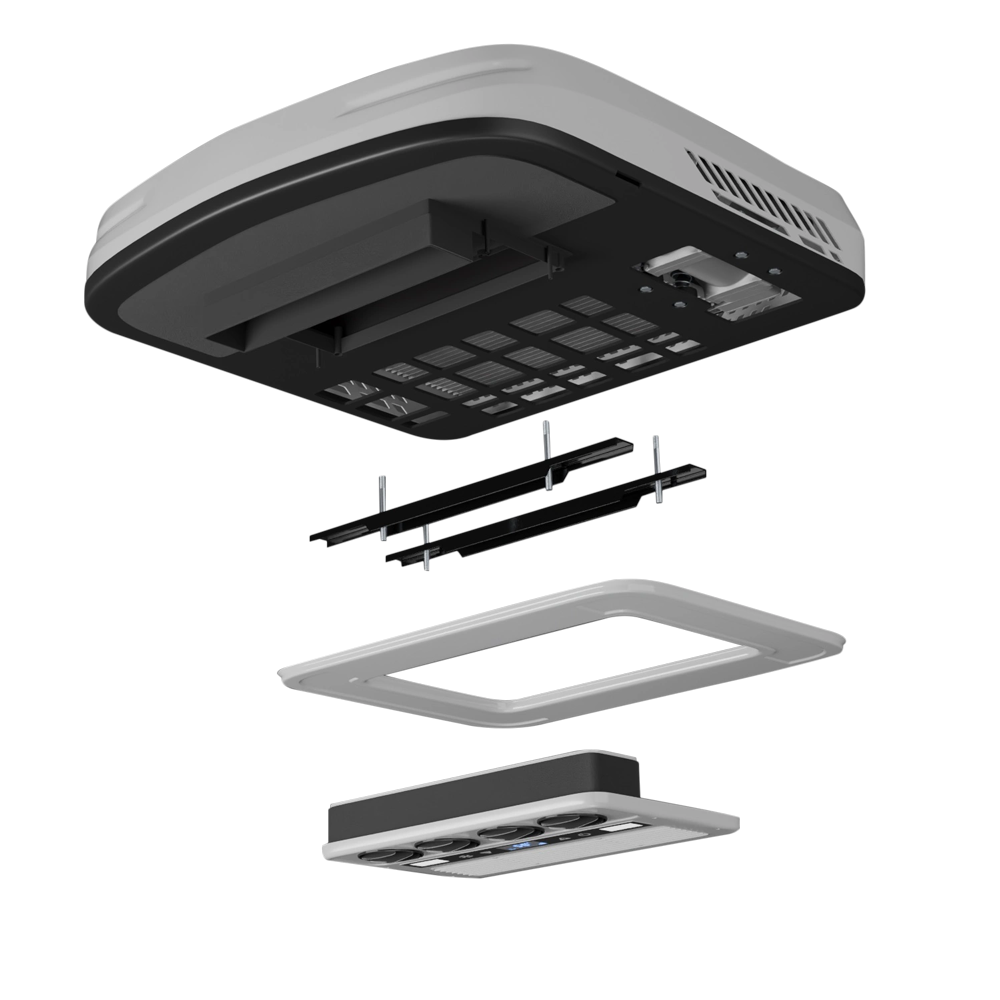
1. Mount external unit: Clean roof, apply gasket around the roof opening.
2. Secure with brackets: Attach rods to unit base, align and tighten brackets to roof.
3. Install indoor panel: Align with external unit rods, secure tightly.

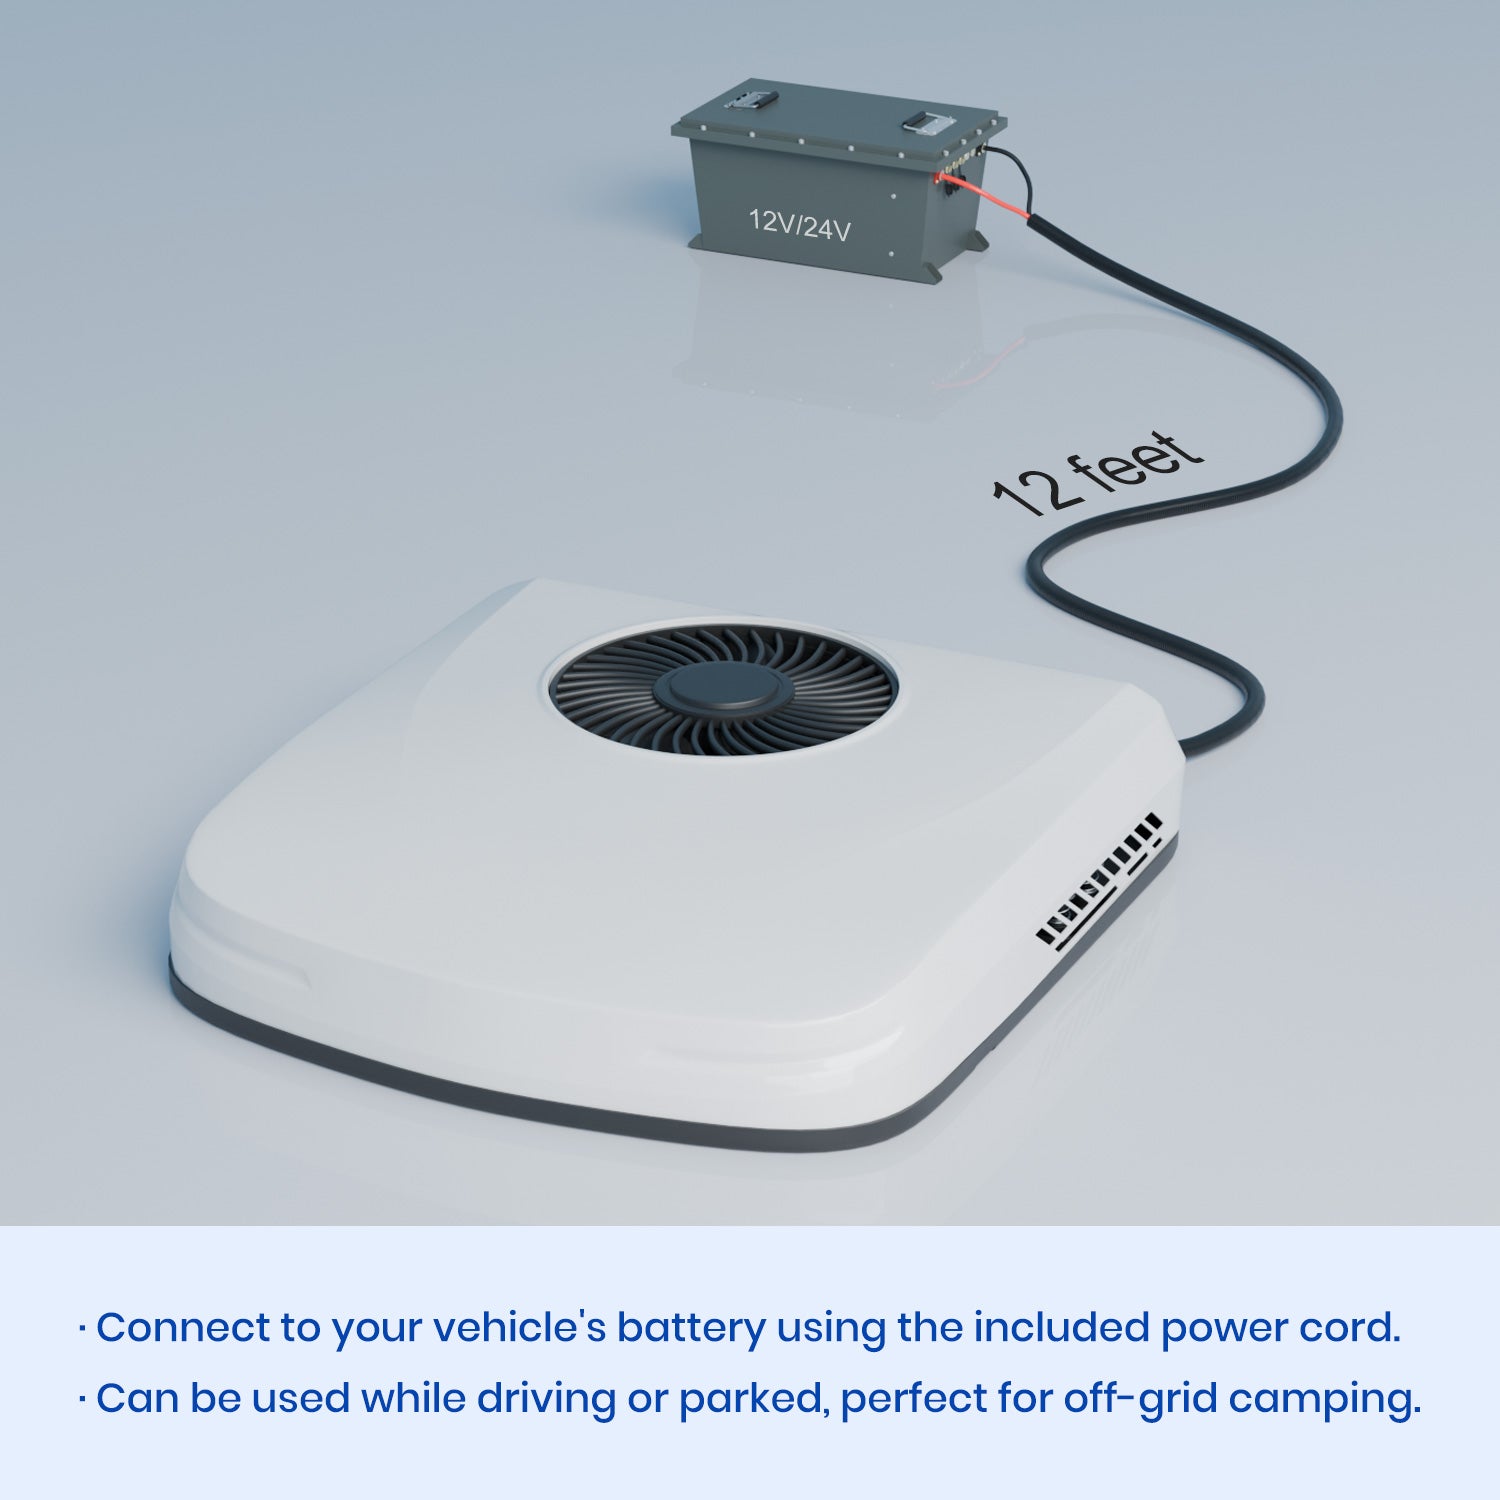
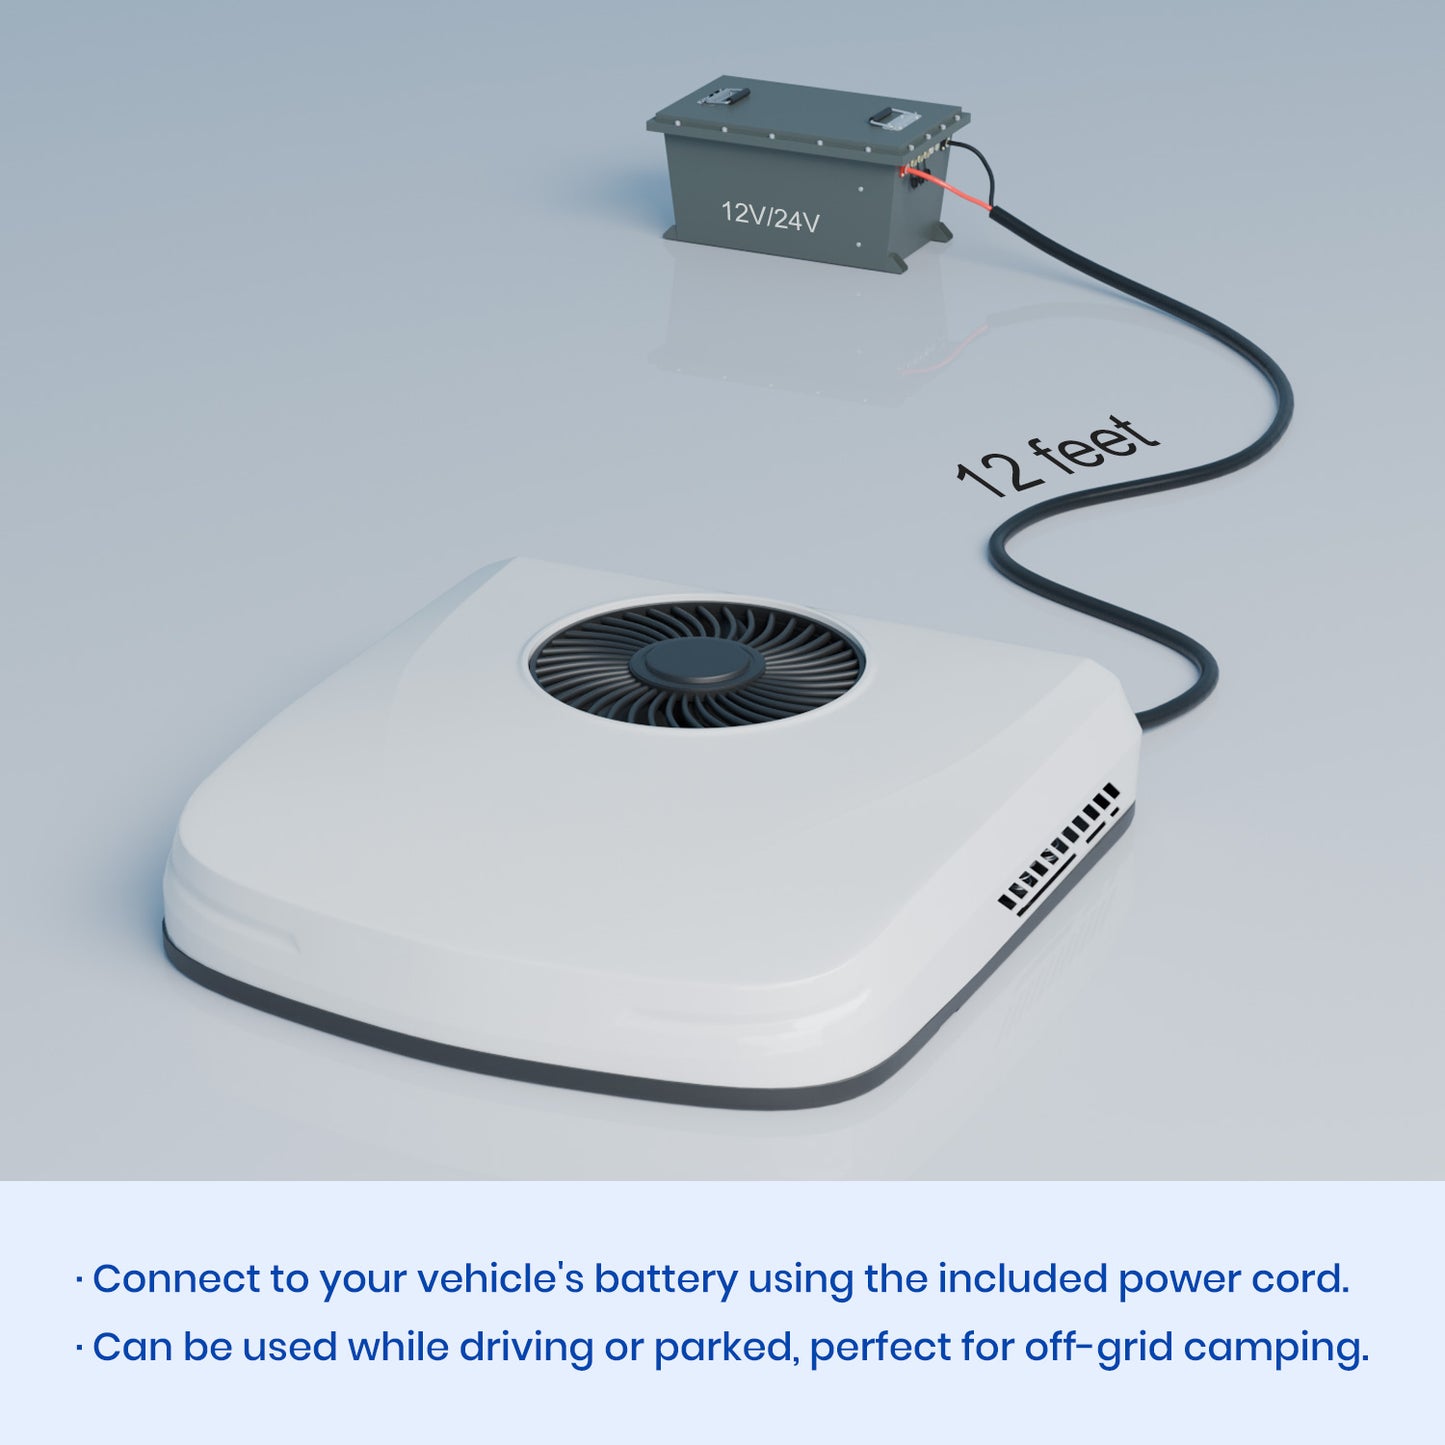
12V/24V Powered

Heating & Cooling

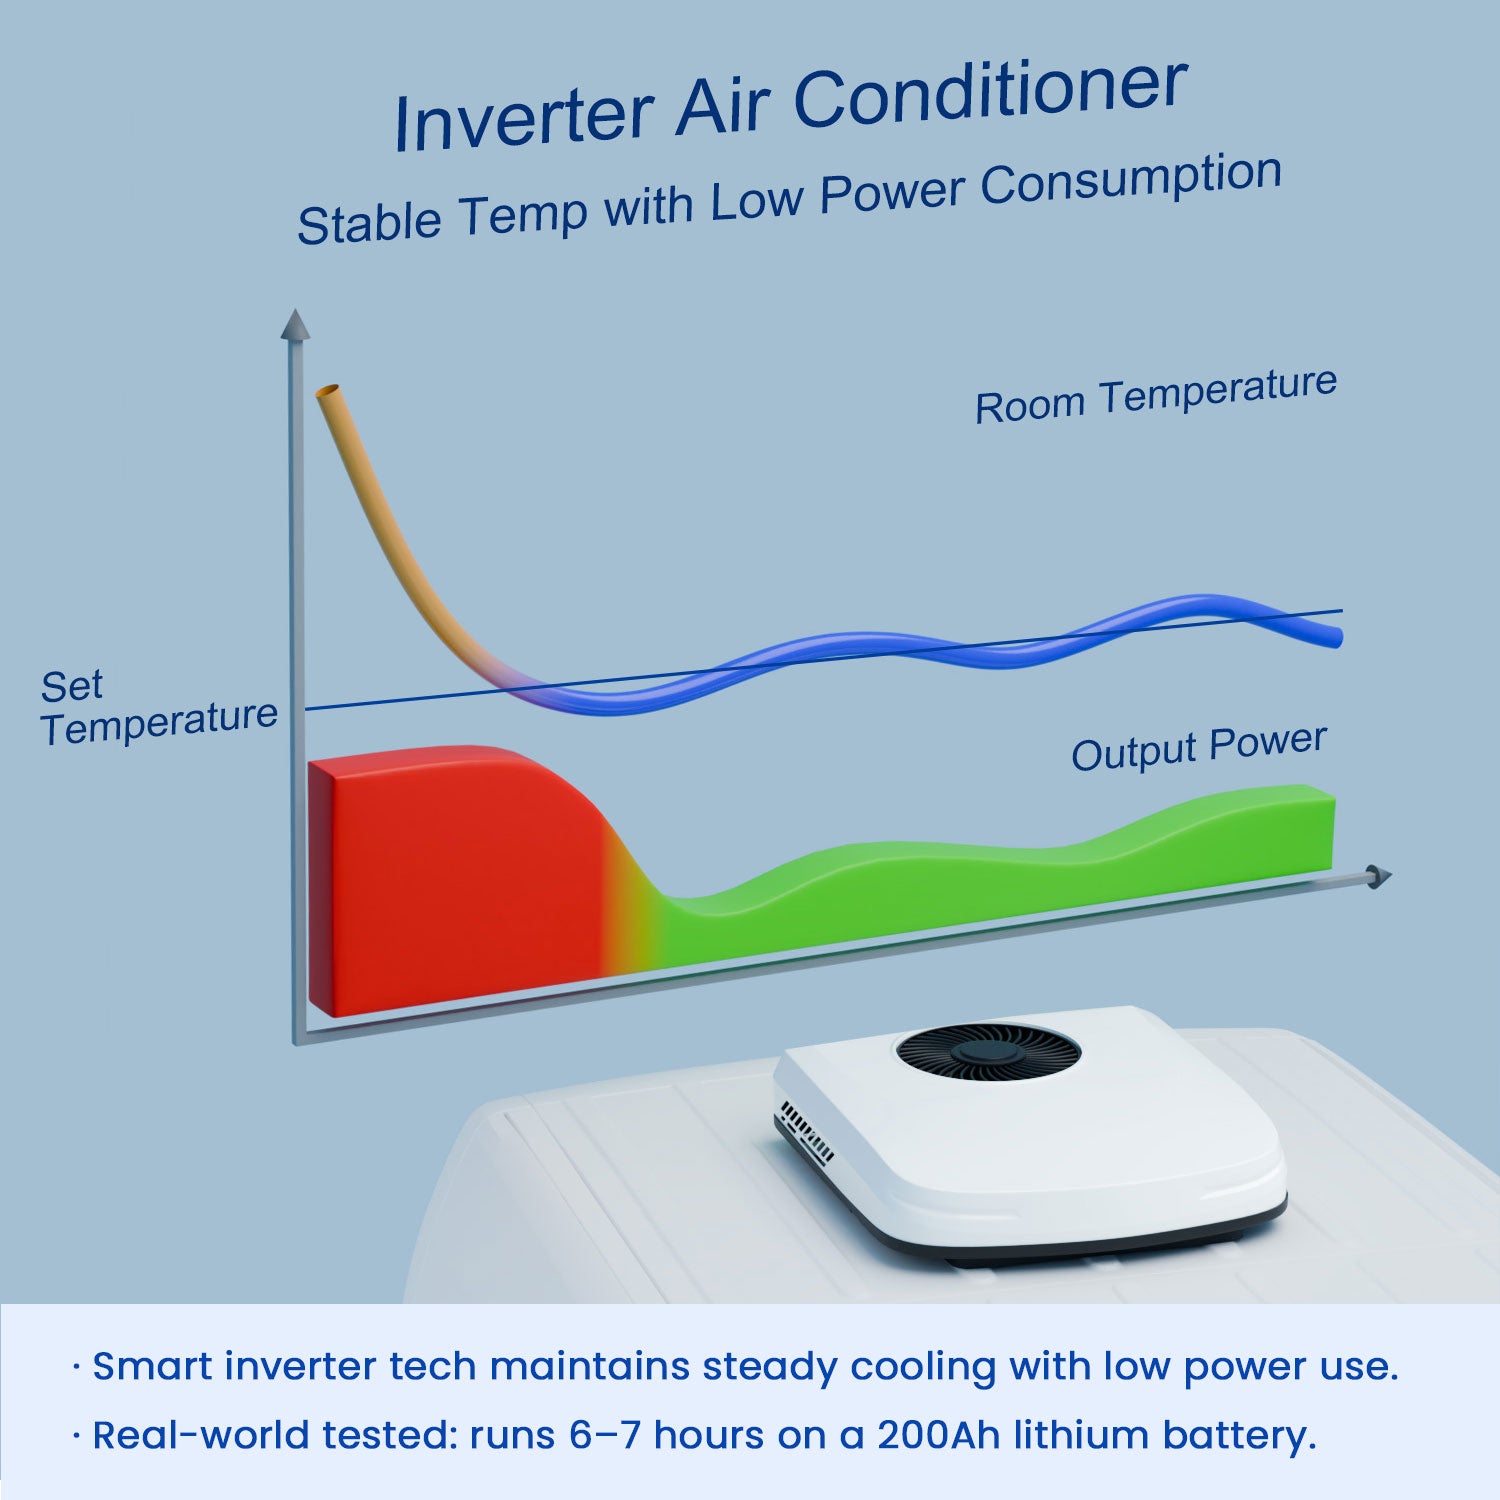
Inverter Technology

Lightweight Lowprofile

Powerful Capacity

Battery Protection


1. Mount external unit: Clean roof, apply gasket around the roof opening.
2. Secure with brackets: Attach rods to unit base, align and tighten brackets to roof.
3. Install indoor panel: Align with external unit rods, secure tightly.
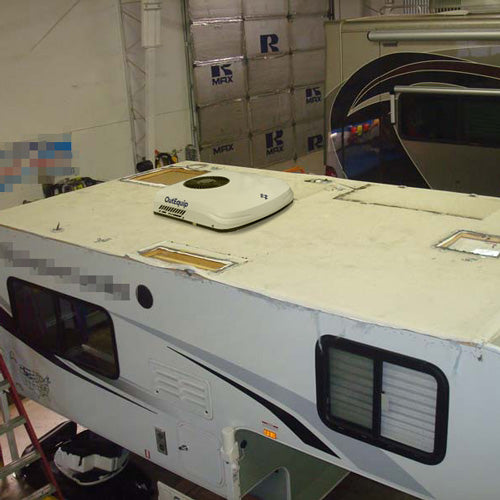
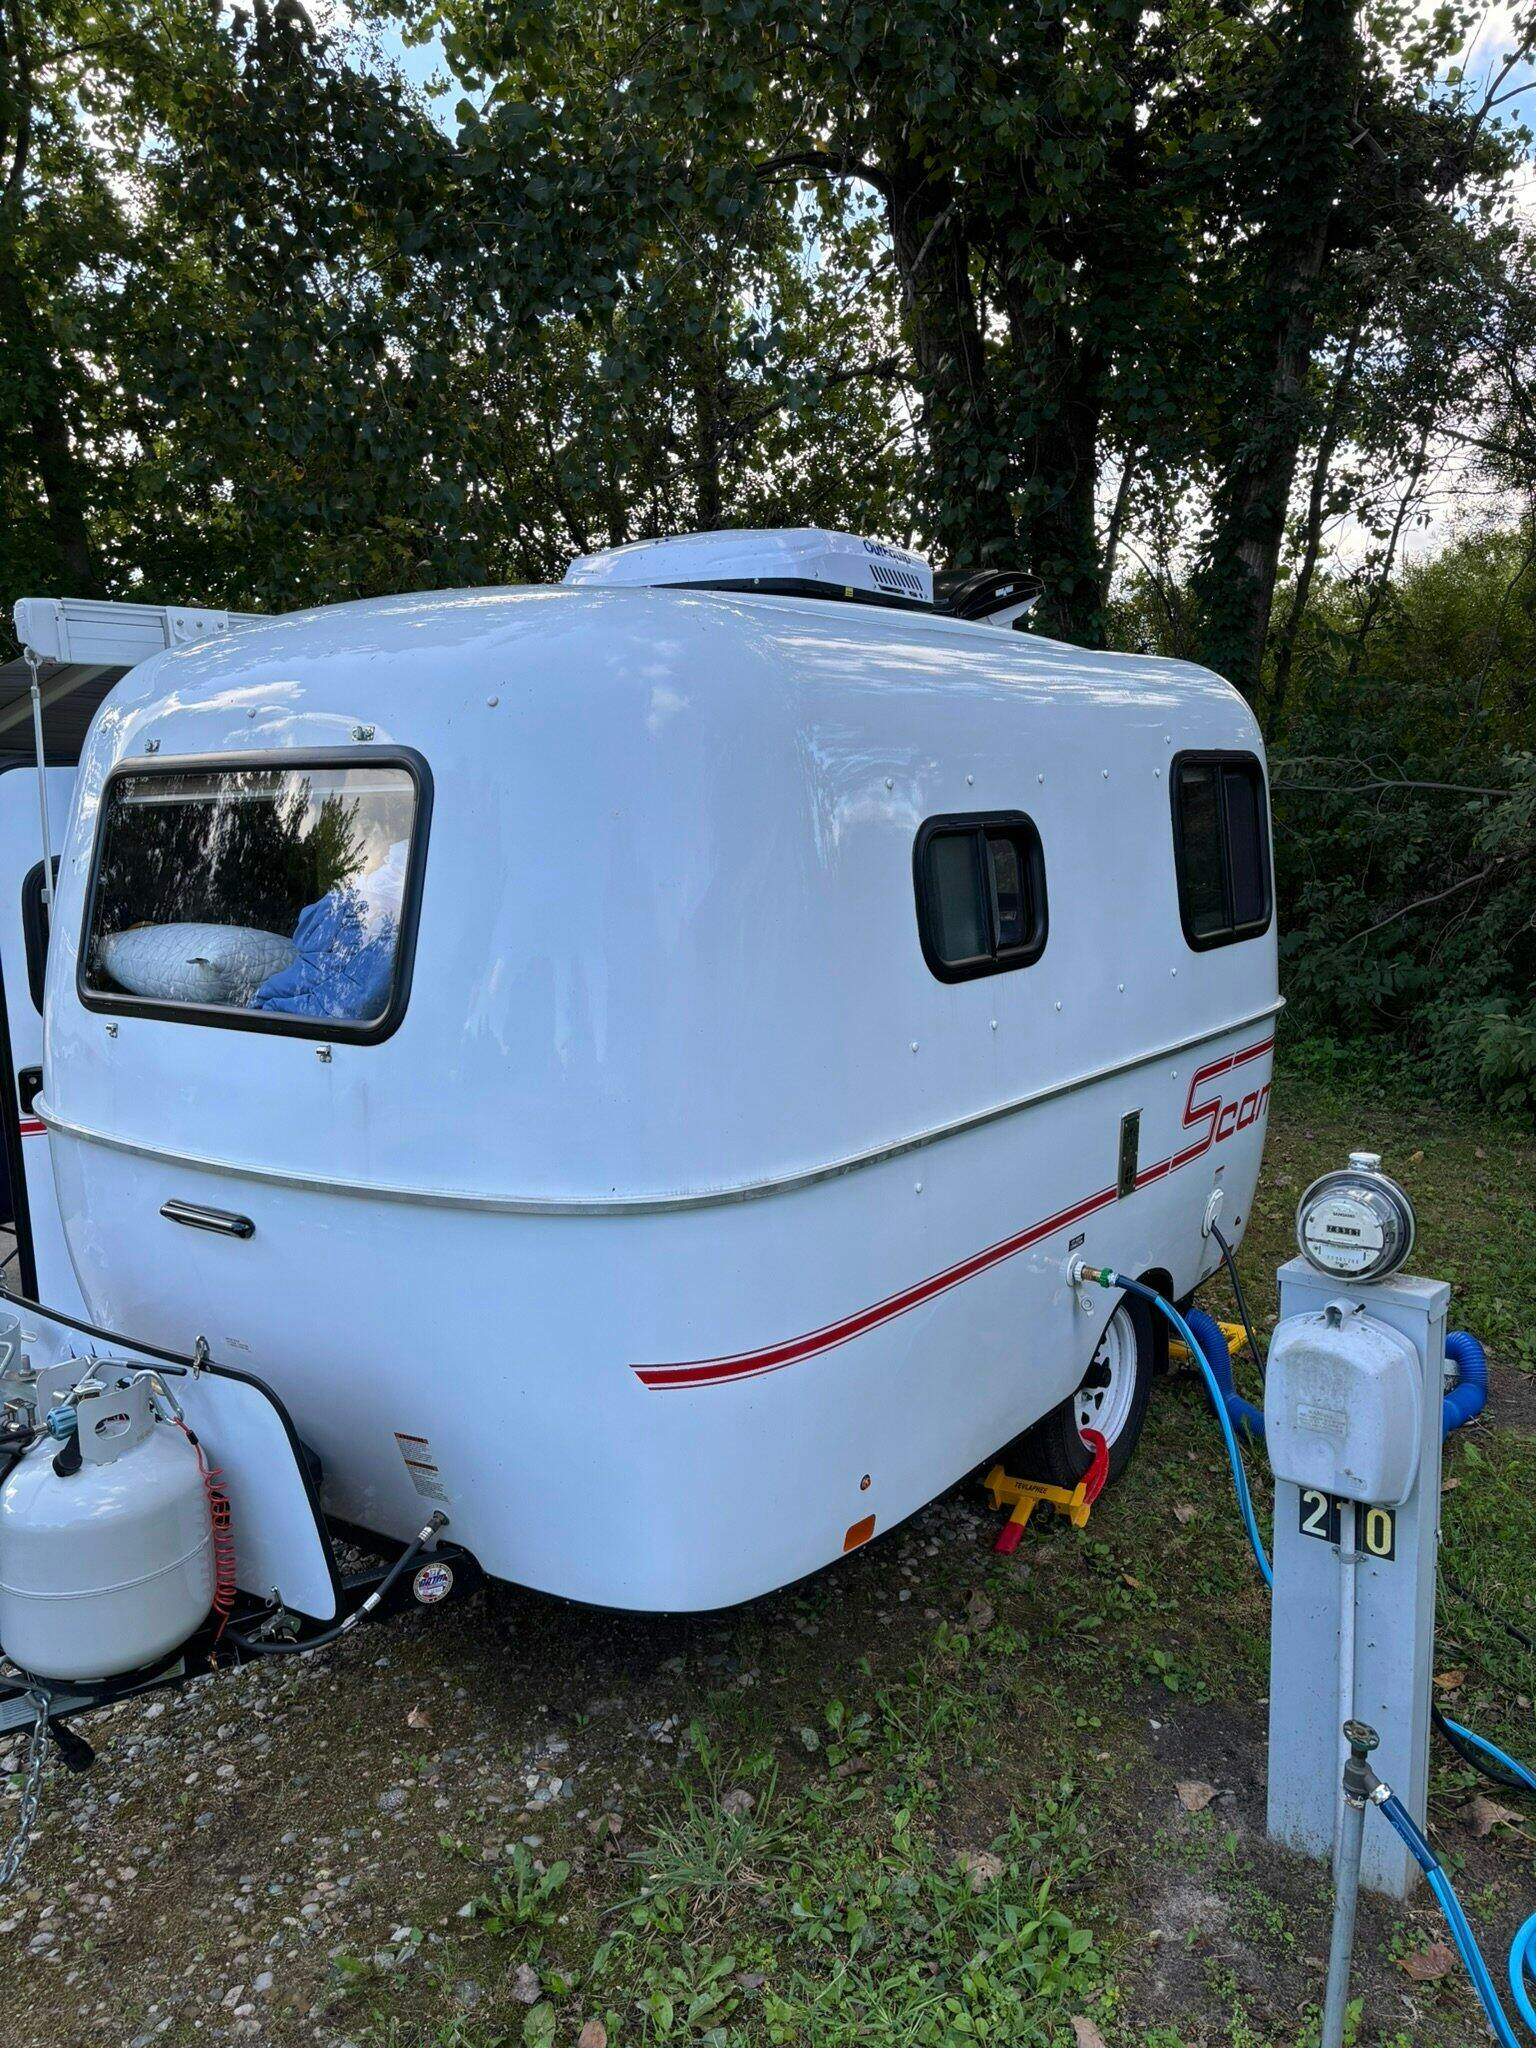
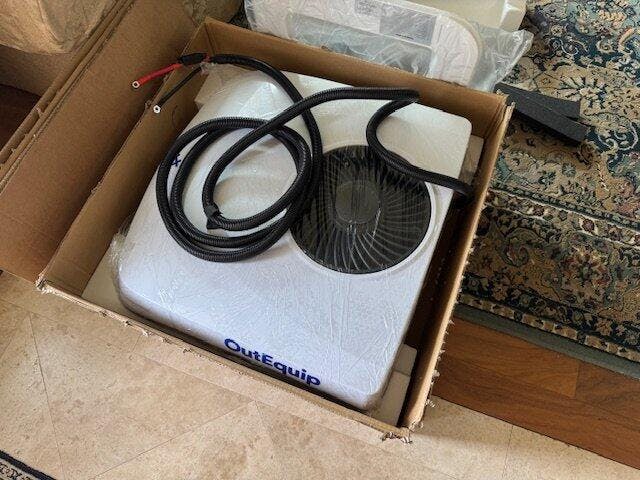
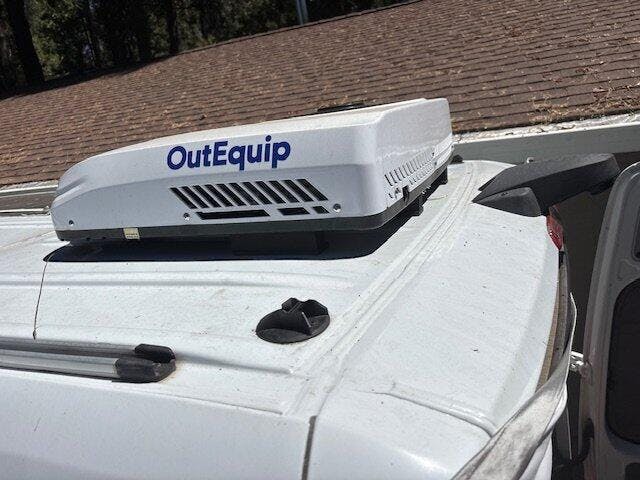
I installed the Outequipt 12V DC Air Conditioner in my 2022 Scamp 13’ camper as a replacement for the factory-installed Dometic AC. Based on advice from OutEquip’s excellent customer support team, I wired it using an Eagwell 12V Power Supply (https://a.co/d/bBWwVoo) connected shore power. I placed the power supply near the House battery to allow for upgrading to off-grid power with a lithium battery and/or solar in the future. The only challenge was fishing the supplied larger copper wires from the AC to the power supply. I chose to do this inside the camper. With the advice of Scamp, I was able to easily peel back the upholstery along one of the seams and use 3M spray adhesive to secure it once the wiring was hidden behind. The wiring would have been much easier to install outside the camper but this was a matter of personal preference.
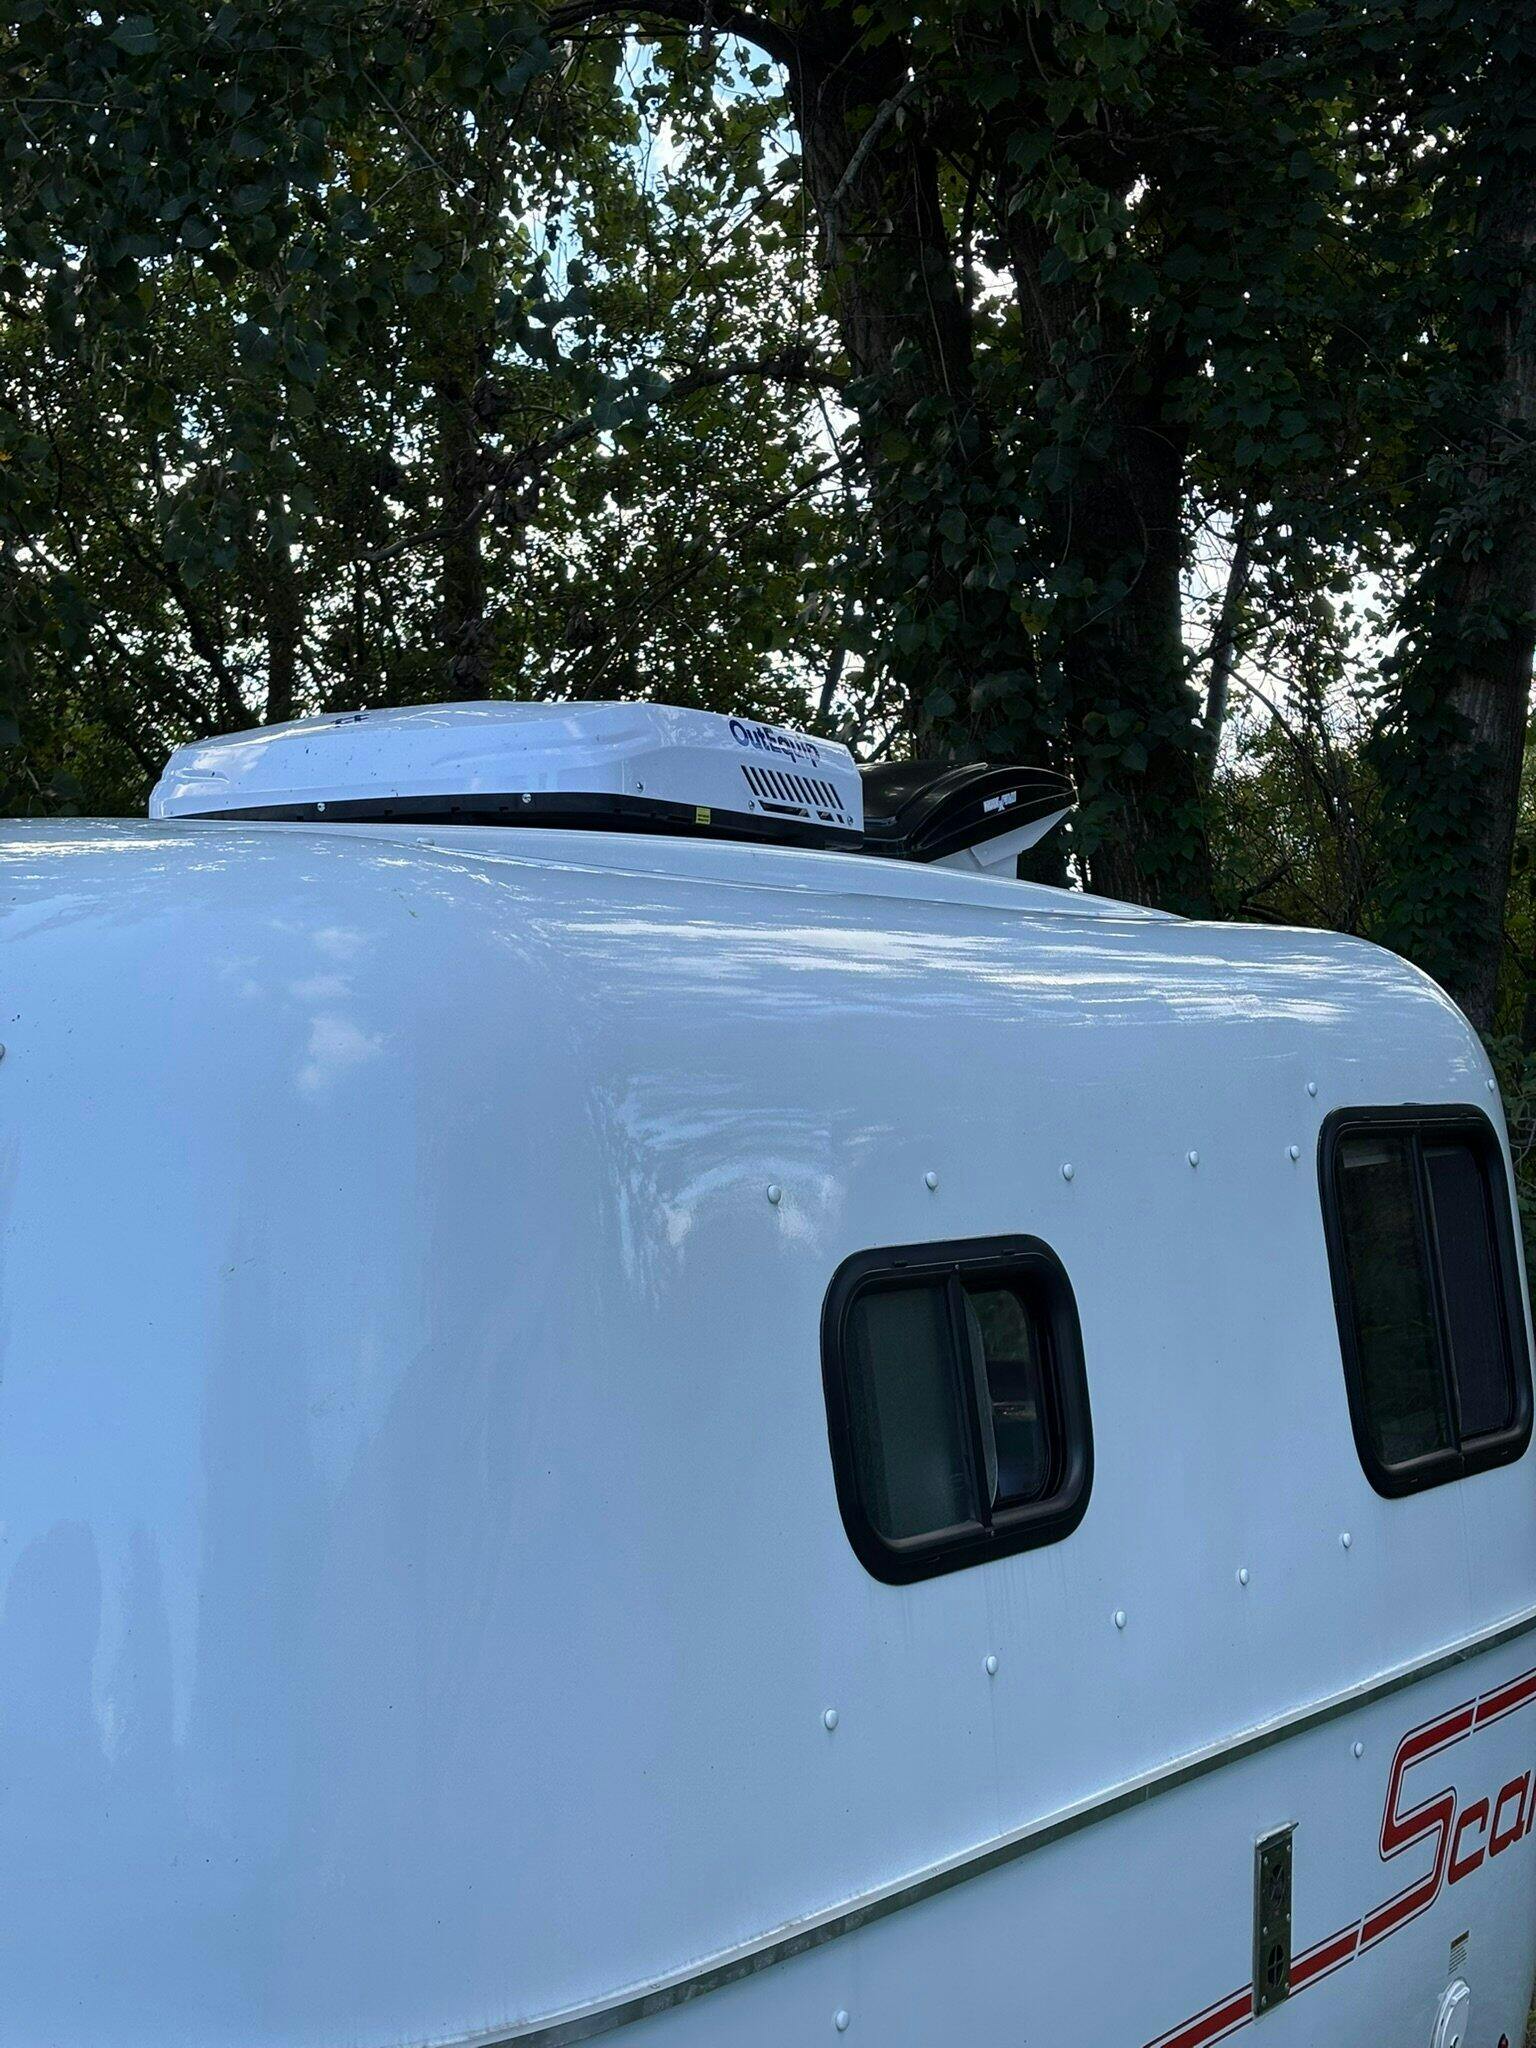
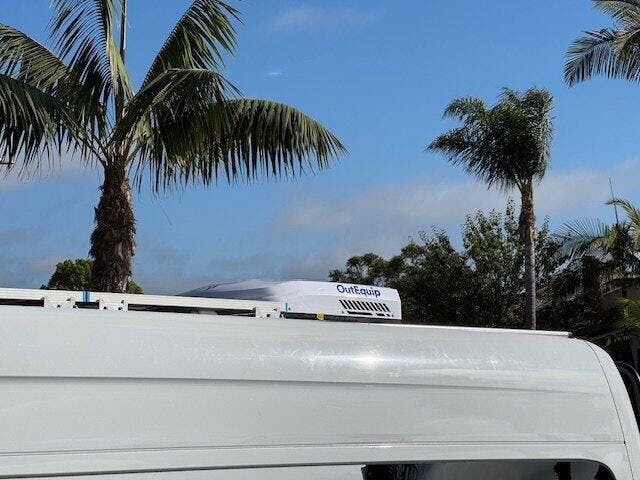
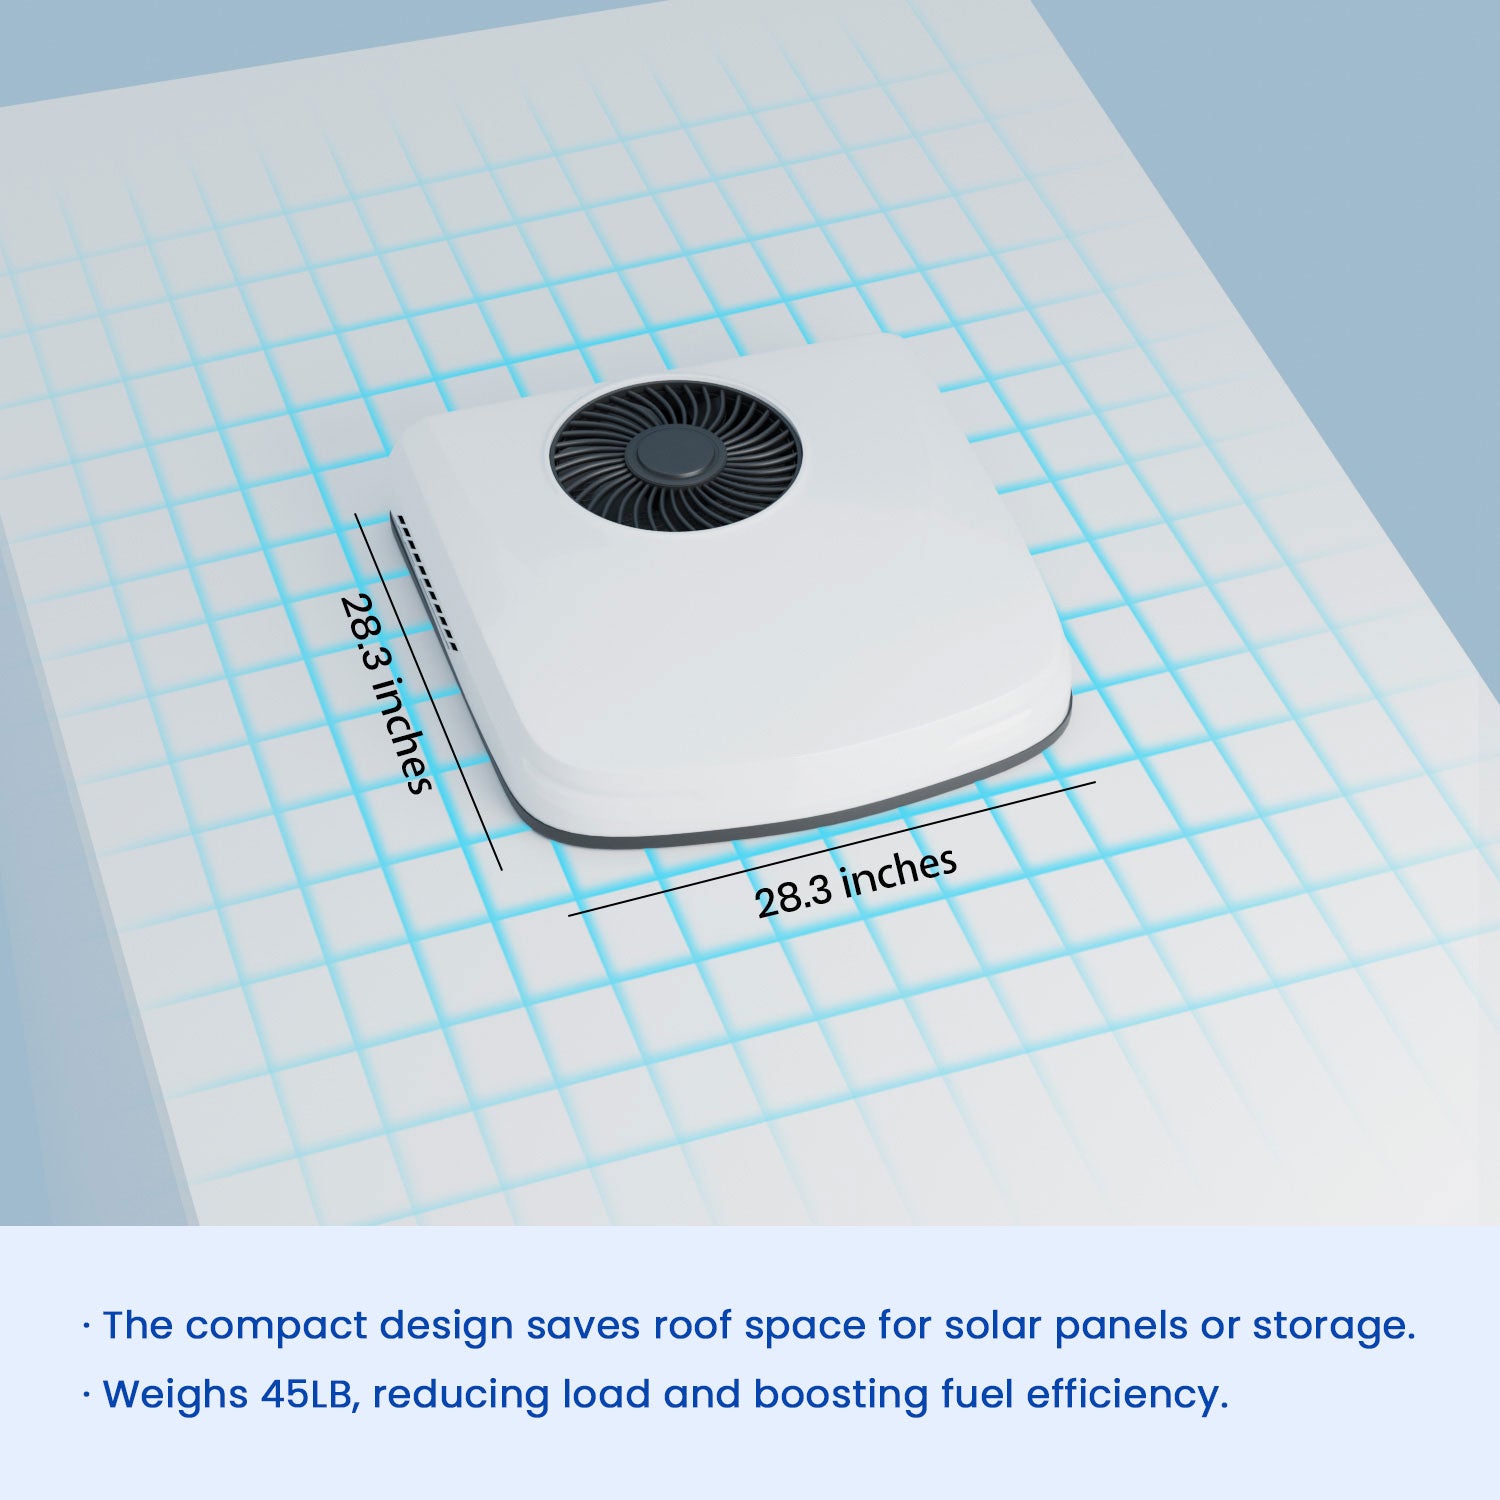
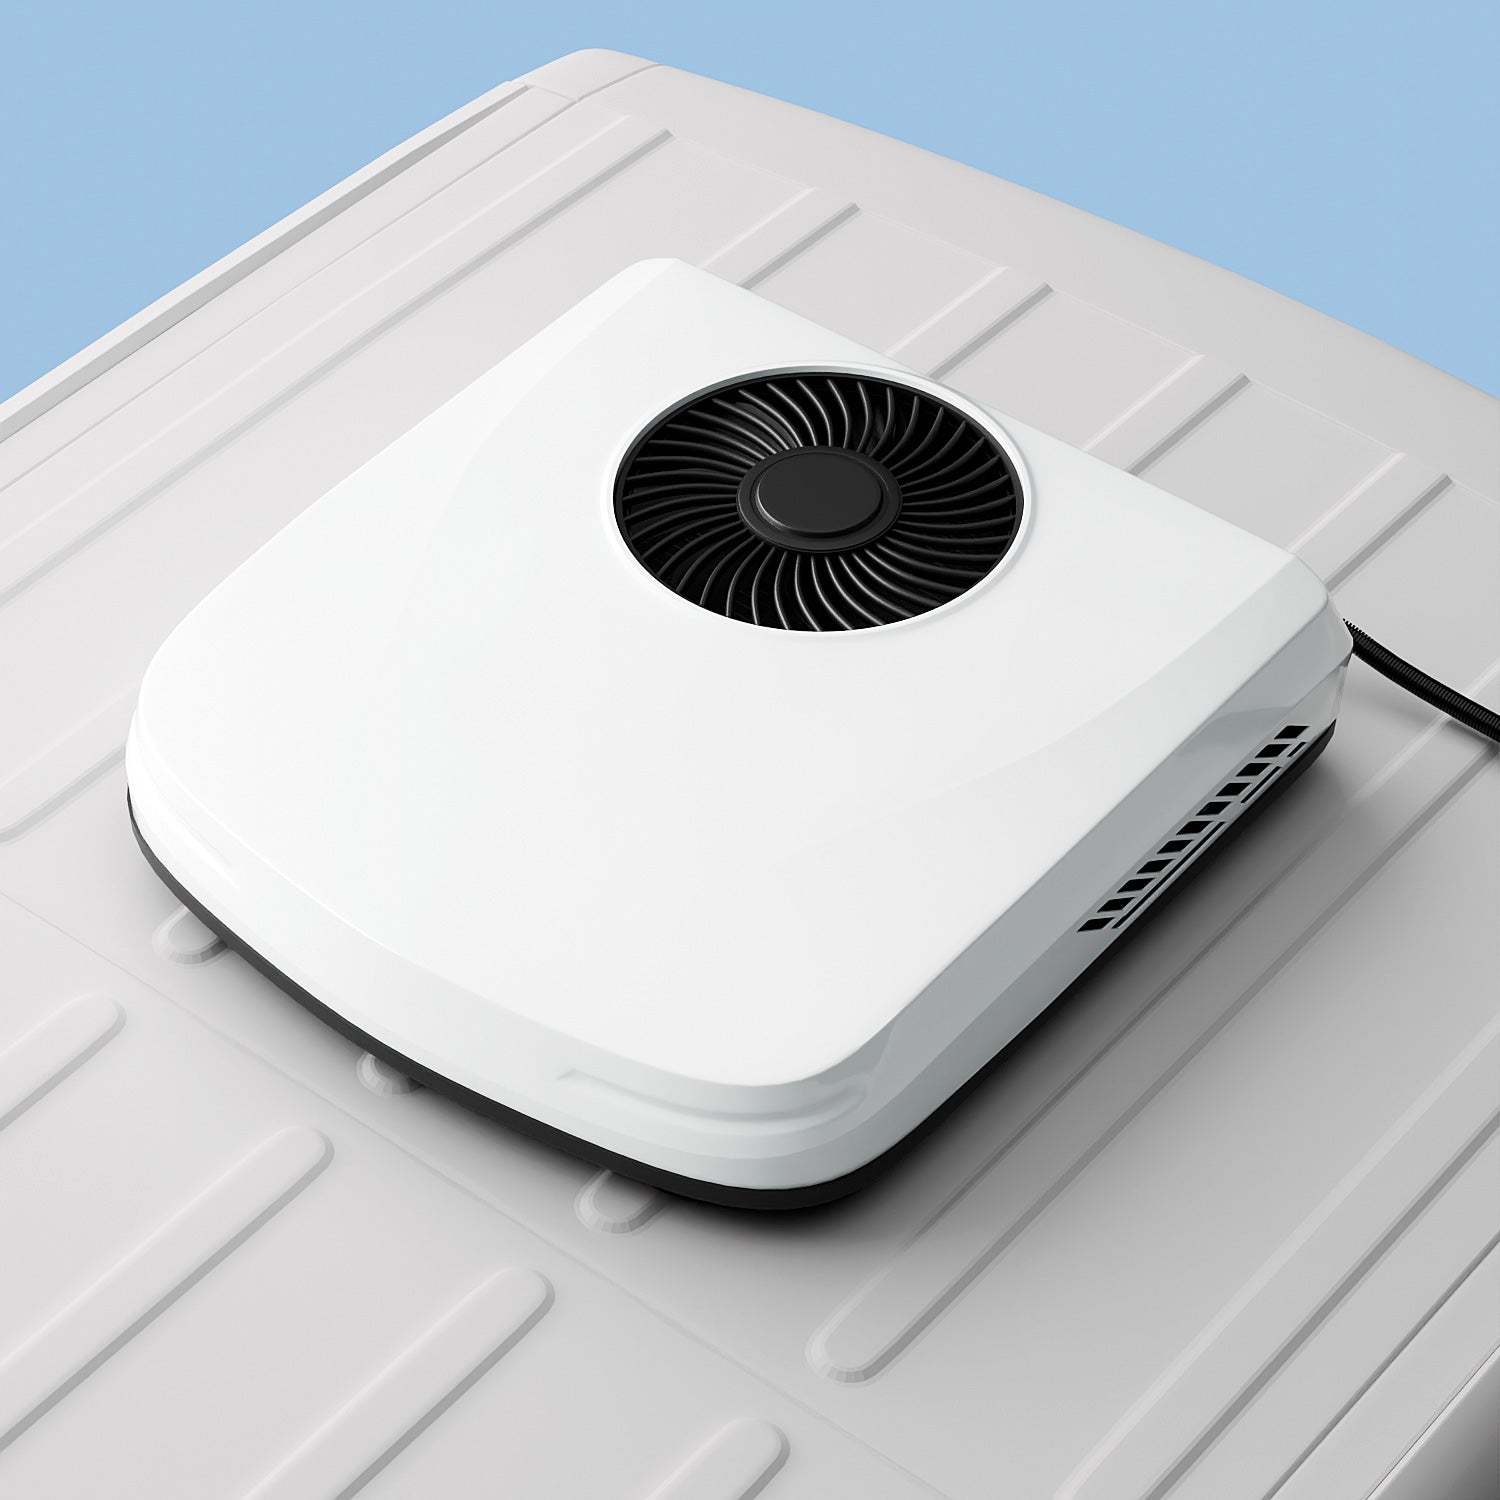
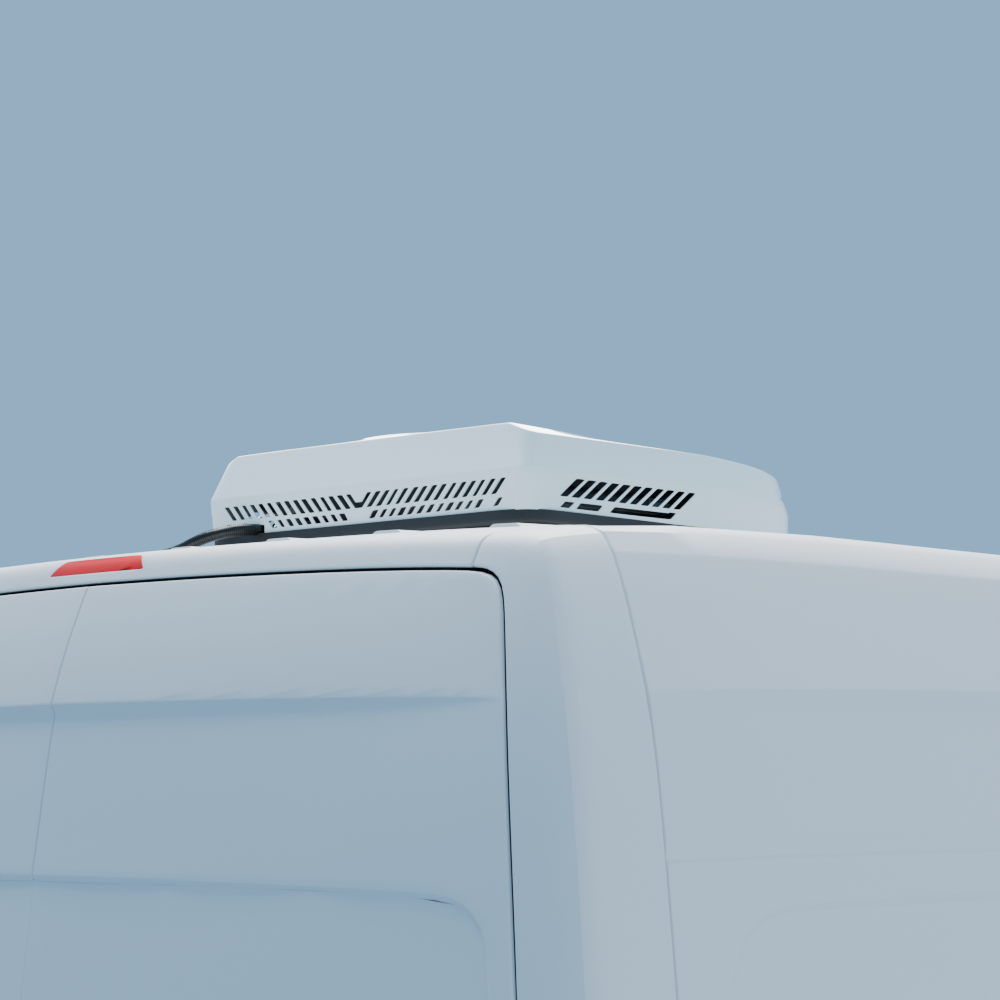
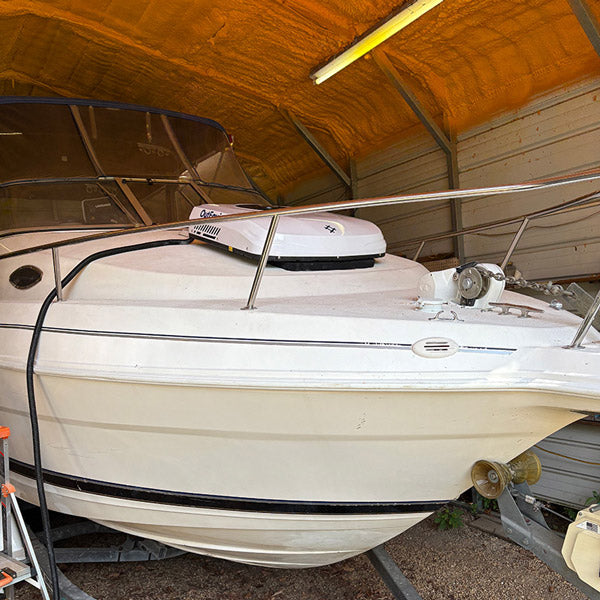
One of the biggest benefits is the slim footprint of the Outequipt unit. Unlike the bulky OEM AC, it allows me to store the camper inside my 8’ tall residential garage without clearance issues. Performance-wise, the Outequipt unit has exceeded expectations. It runs much quieter than the factory AC, making it far more comfortable for overnight camping. It also provides both cooling and heat, controlled by a remote with thermostat functionality—something the OEM system lacked. That makes it a true all-season solution.
Overall, I’m very pleased with the purchase. The Outequipt DC air conditioner has upgraded both comfort and practicality in my Scamp, while also solving the garage storage problem. I’d highly recommend it to anyone looking for a more compact, versatile, and efficient replacement for their camper’s factory AC—with the added bonus of being ready for future off-grid use.
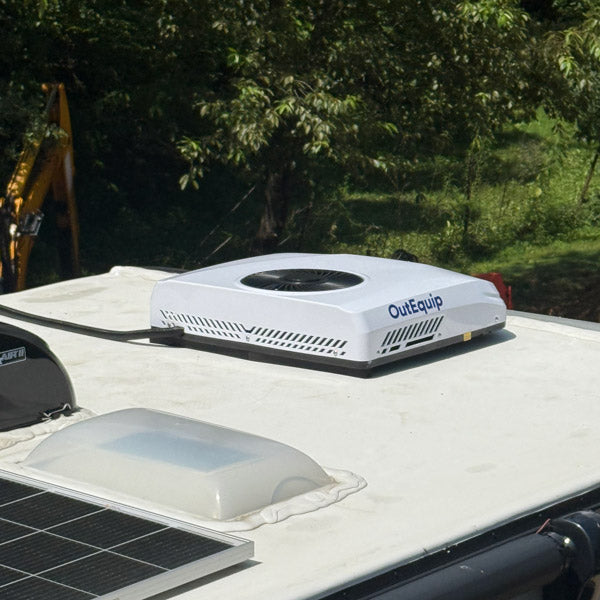
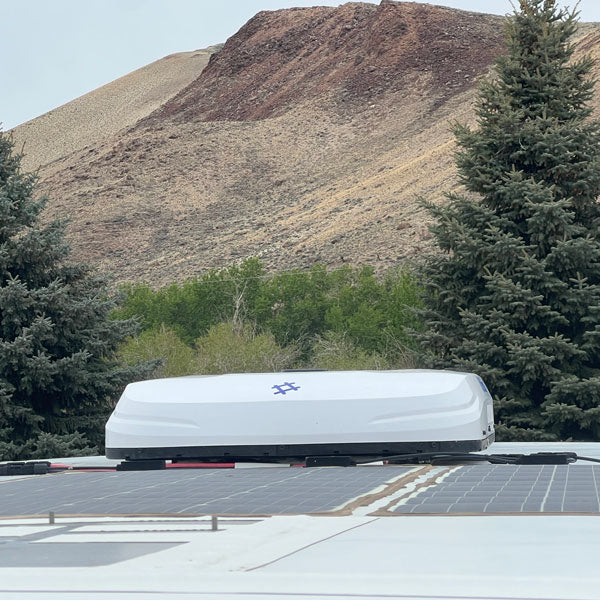
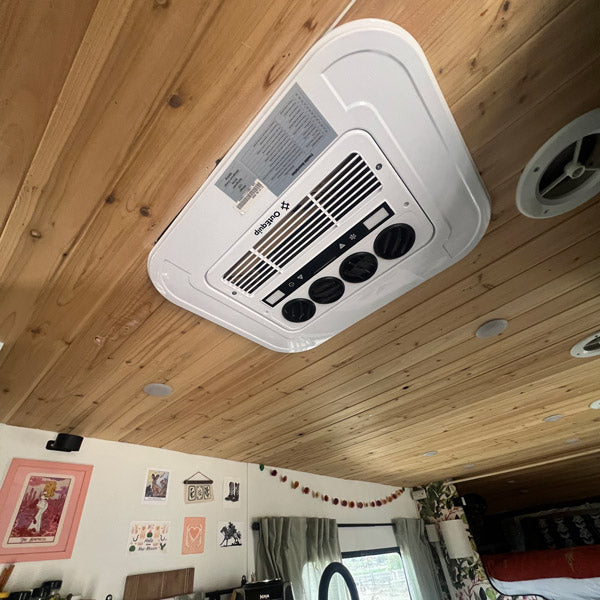
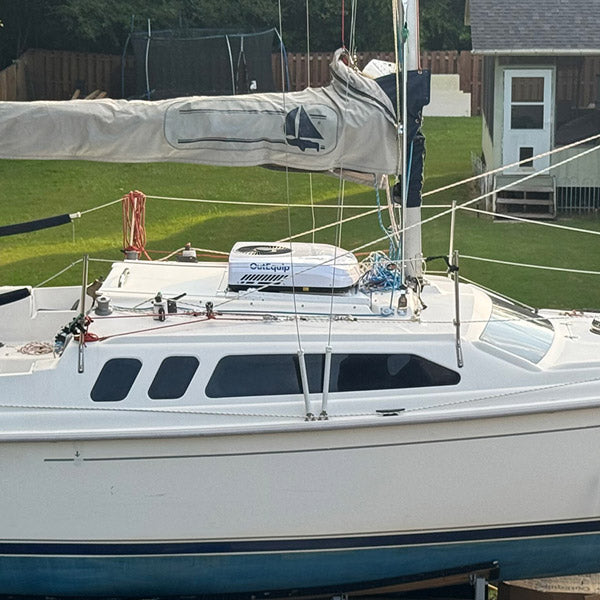
P1: The AC has a smaller vertical footprint inside compared to the OEM Unit. I can now stand under the AC inside!
P2: The Power Supply is in the forward compartment adjacent to the battery wiring.
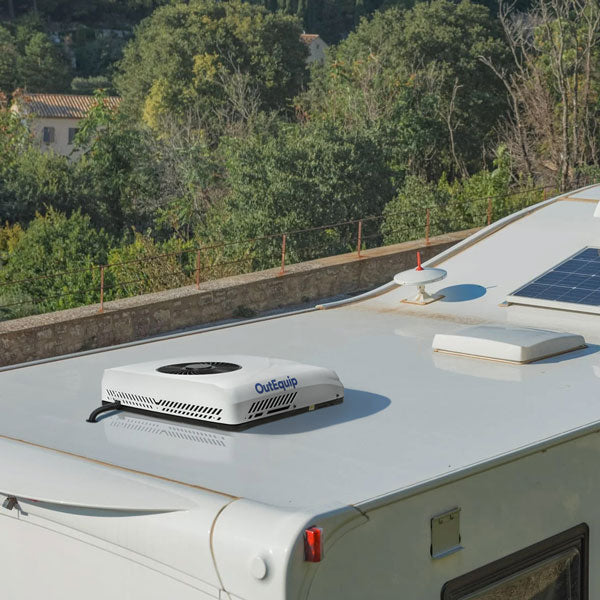
P3: The AC has a smaller vertical footprint outside compared to the OEM Unit allowing fit into garage
P4: Installation was easy given the supplied seal and installation manuals
Luke
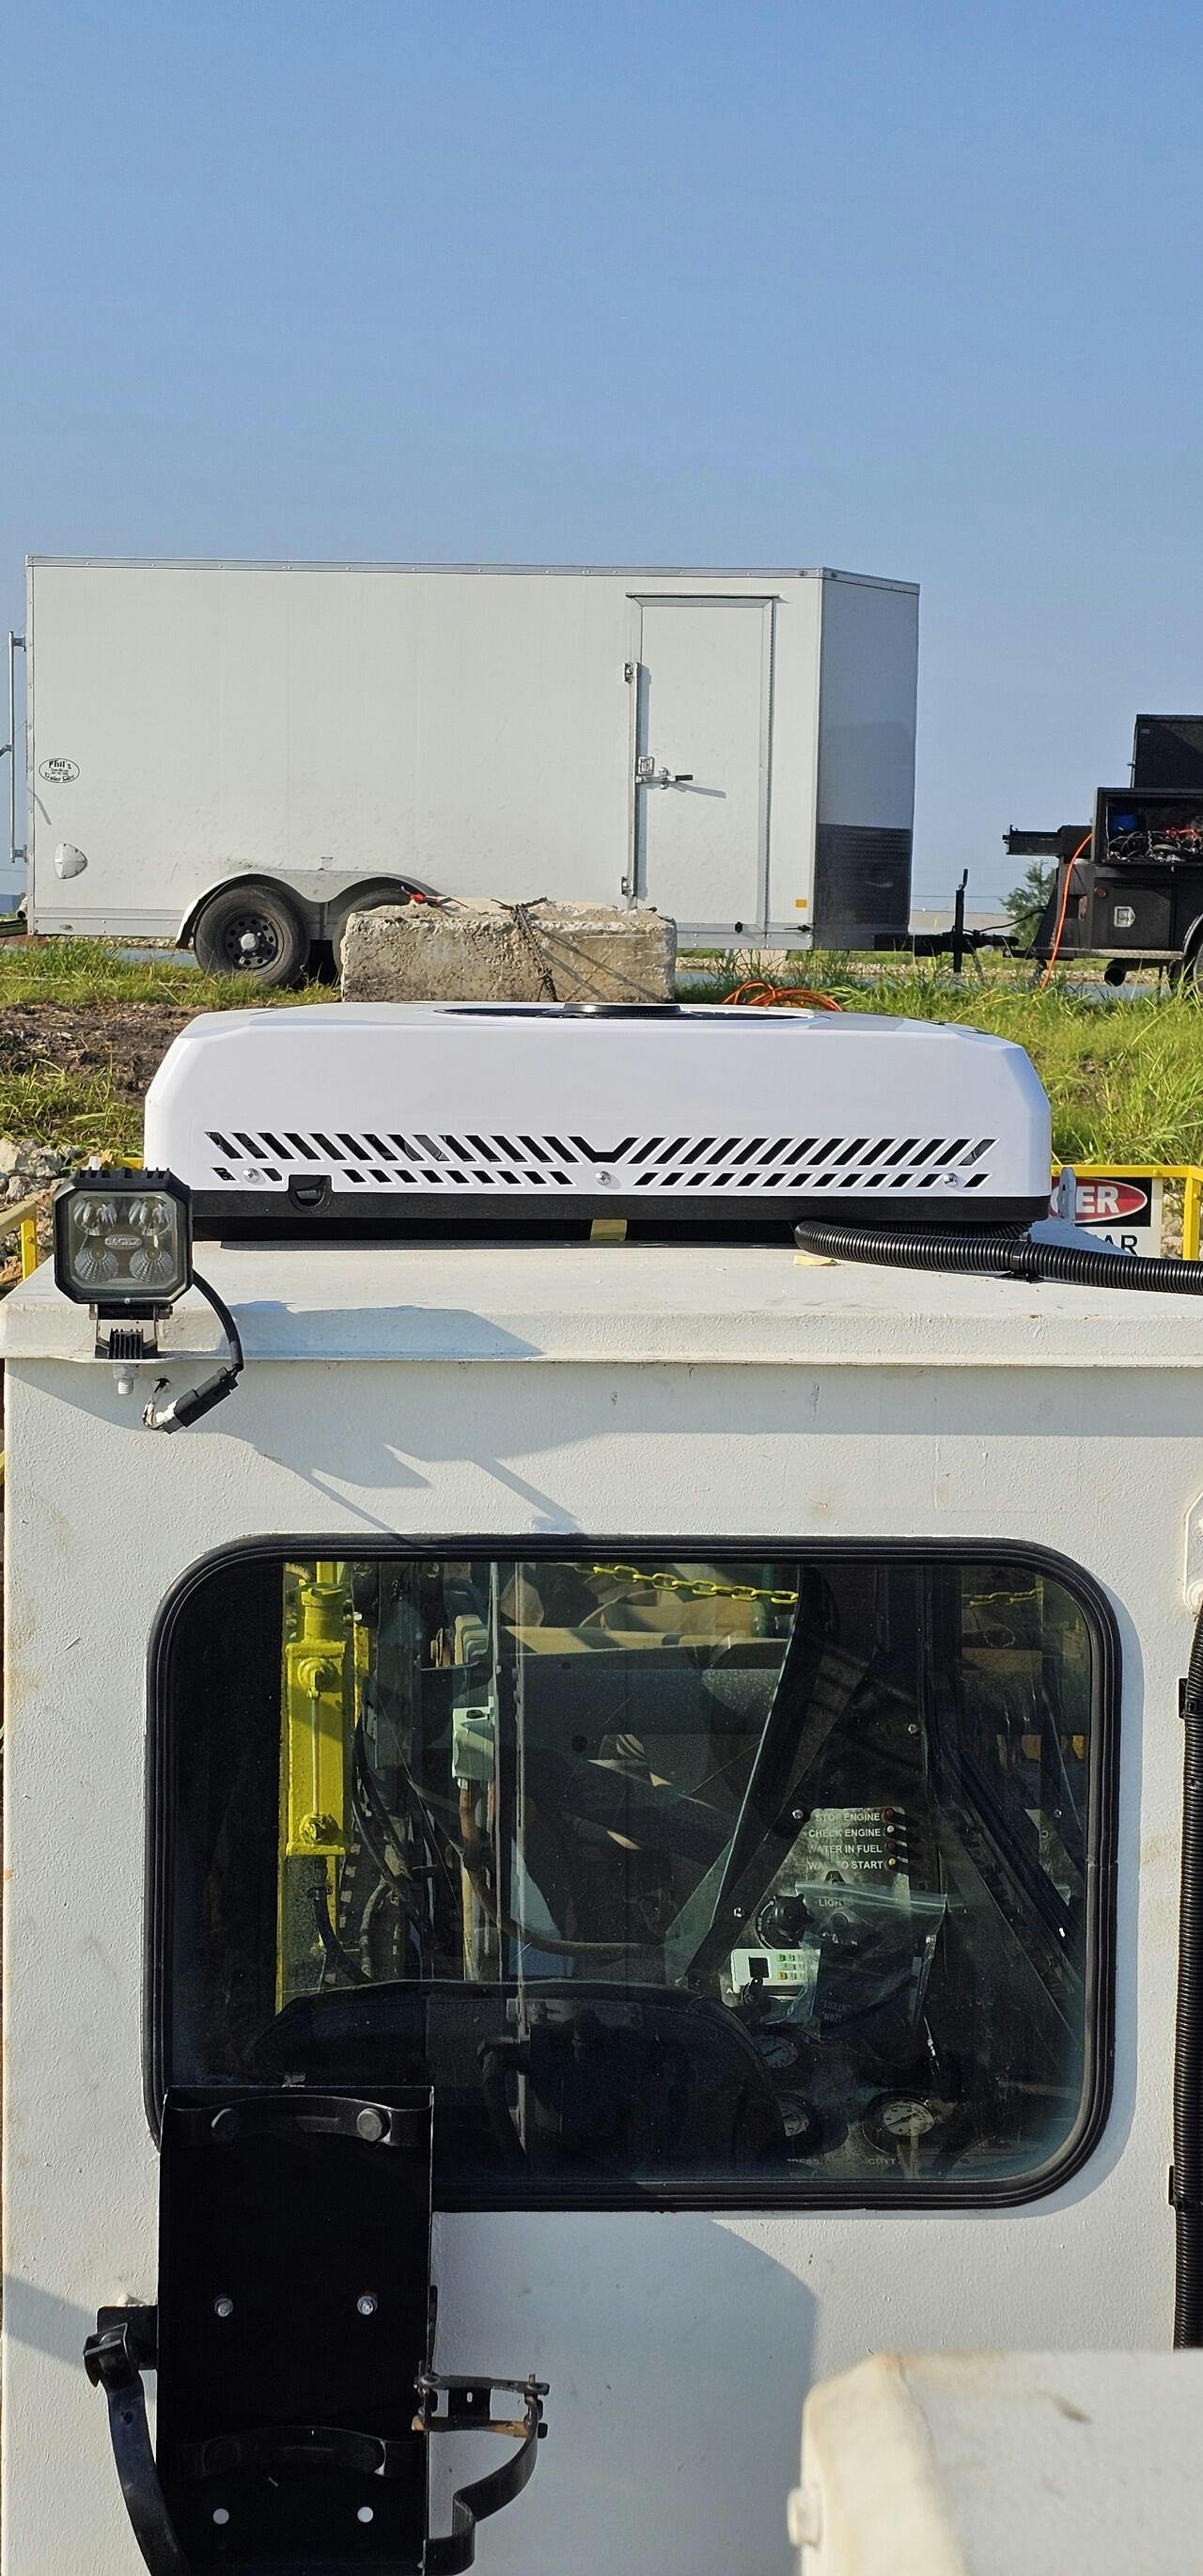
I wanted to give a report of my experience installing an OutEquipPro 12 volt roof air conditioner with the optional heater. I purchased this model to replace a Coleman Mach 8 Plus. It was not given to me for a review. This is just for the good of the community. It was installed in my RAM Promaster 159" WB high roof camper van that I built out about 4 years ago...
I emailed tech support several times and they were quite responsive. I opted for the white cover unit with optional heat (resistive heat BTW). It is supposed to be a 10K btu unit, listed at $946. They were running a 5% off sale at the time. The black cover is more, but I went with white and plan to paint it black with a bed liner spray material. It took about a week to arrive after I placed the order. When it arrived, the white cover had a broken area around one of the screws. They are supposed to be shipping me a free replacement - it has not arrived yet.
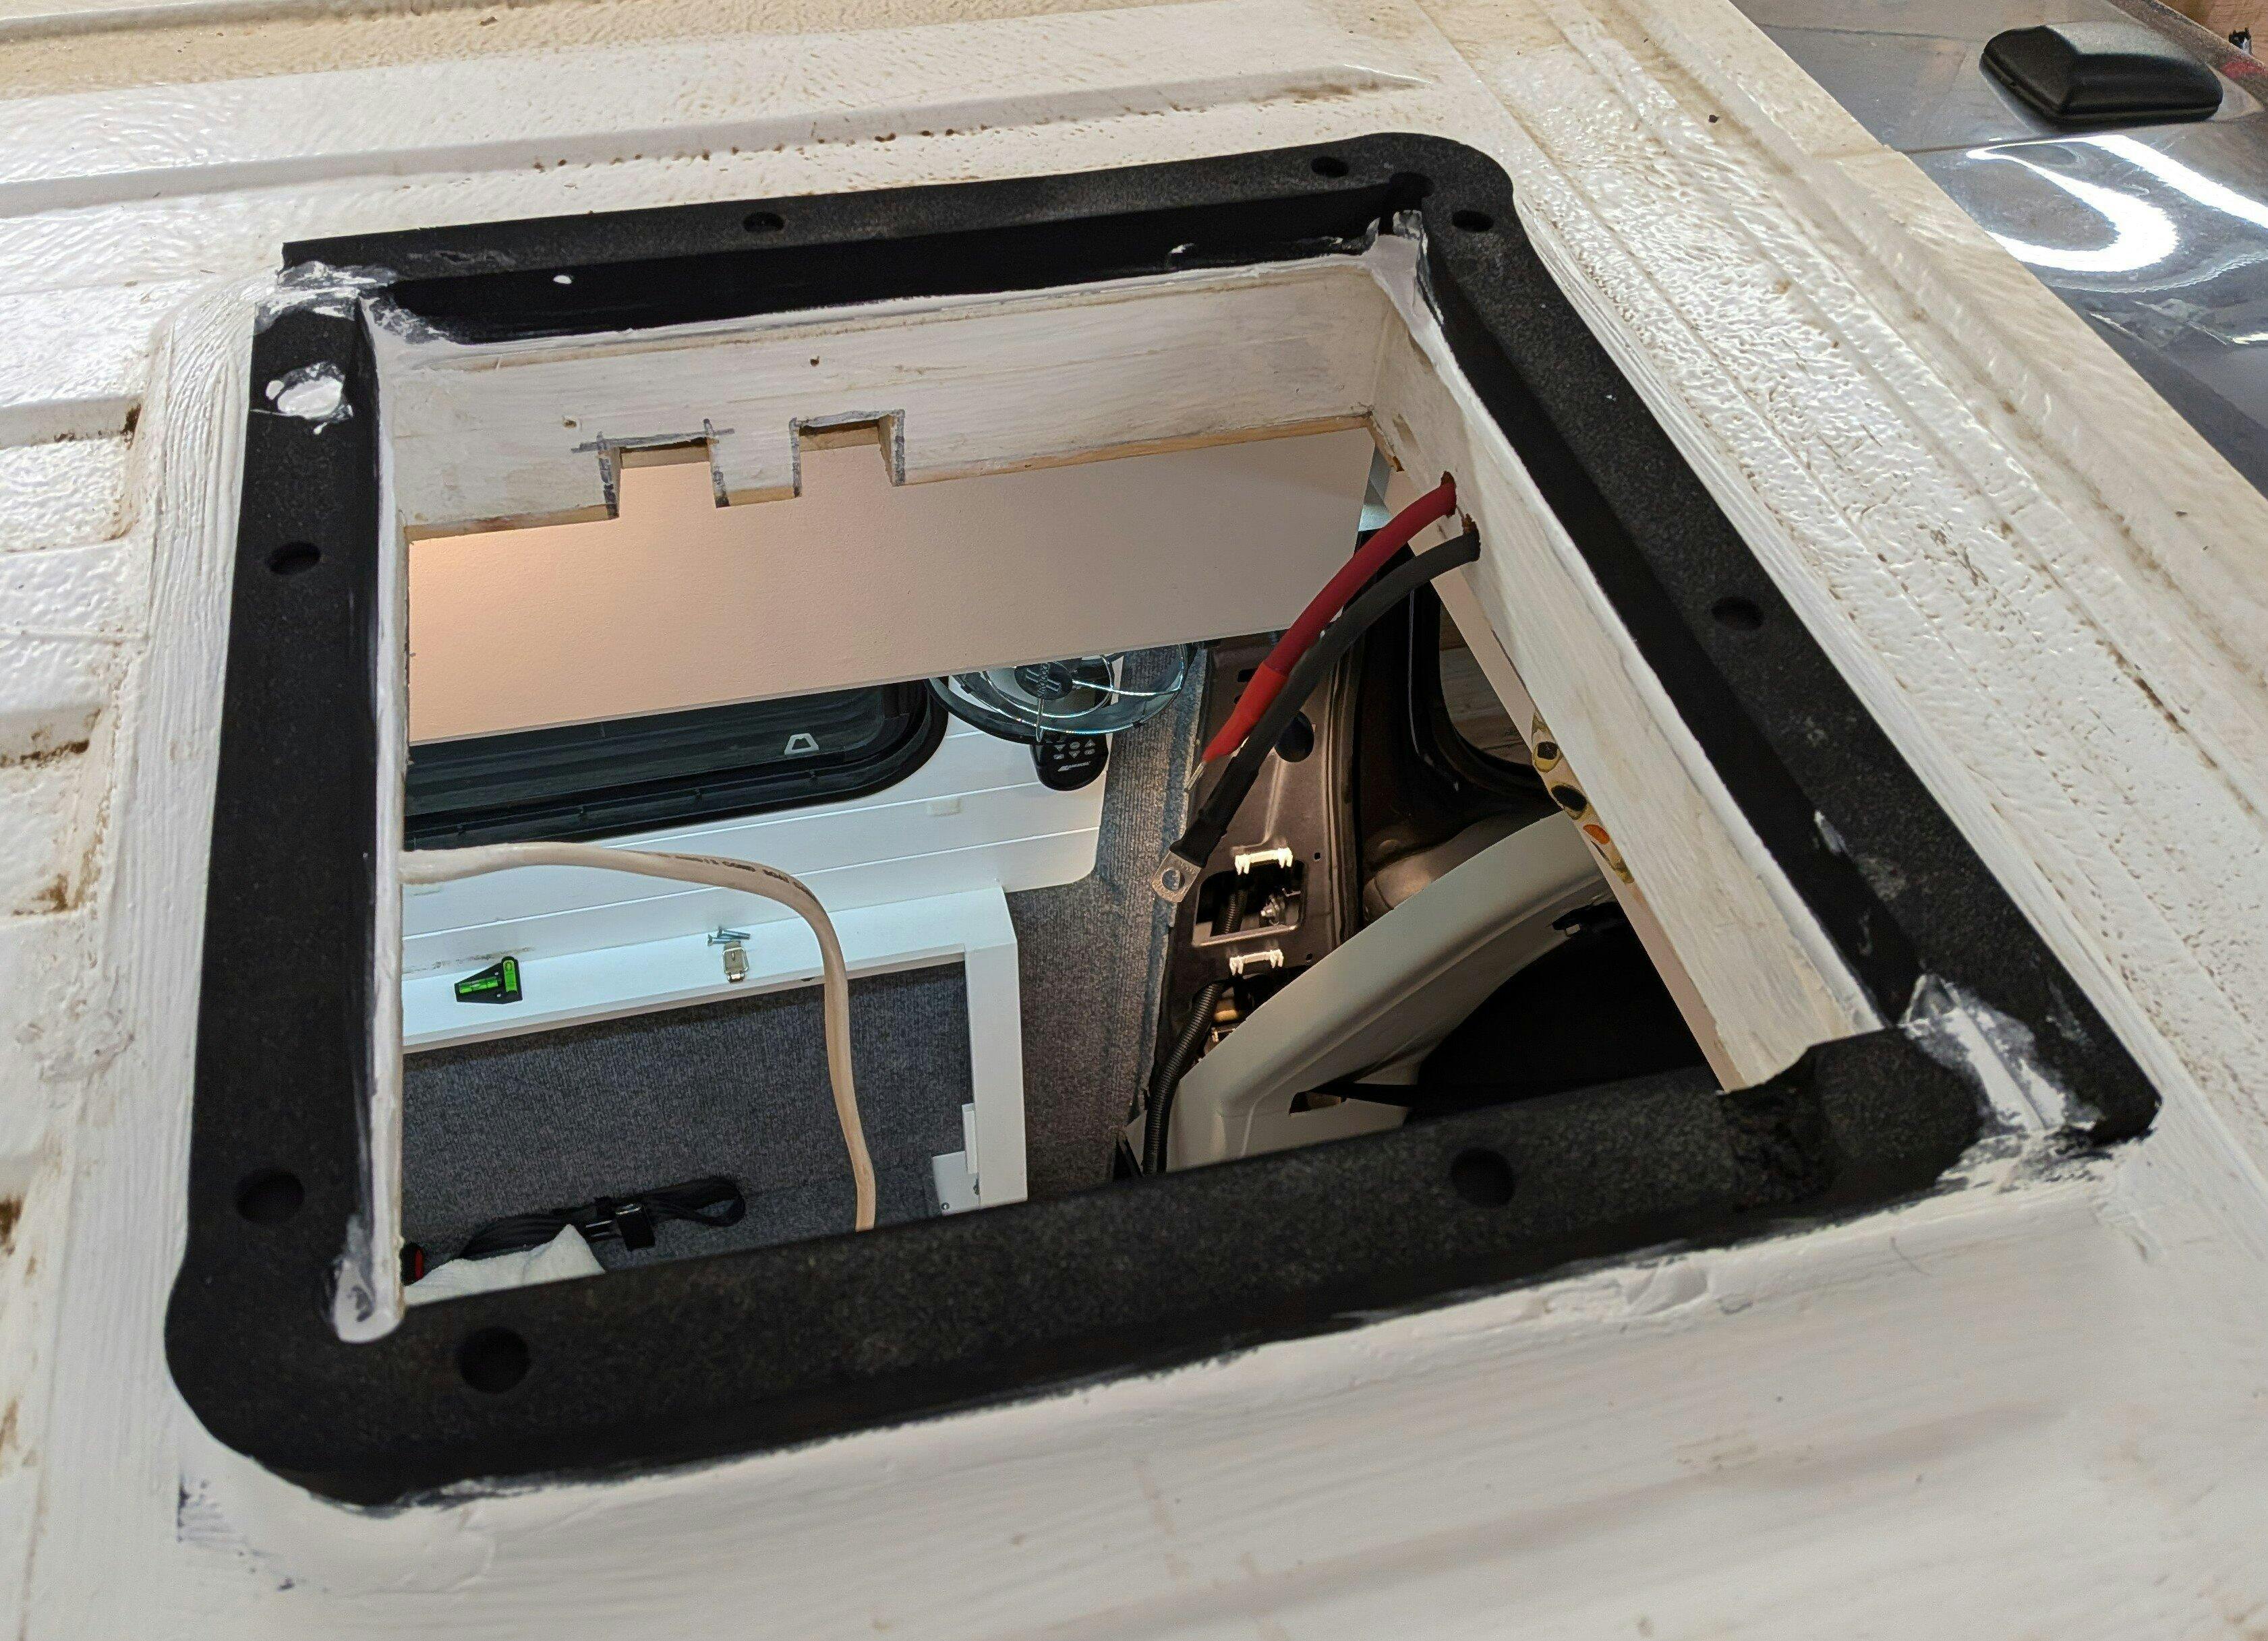
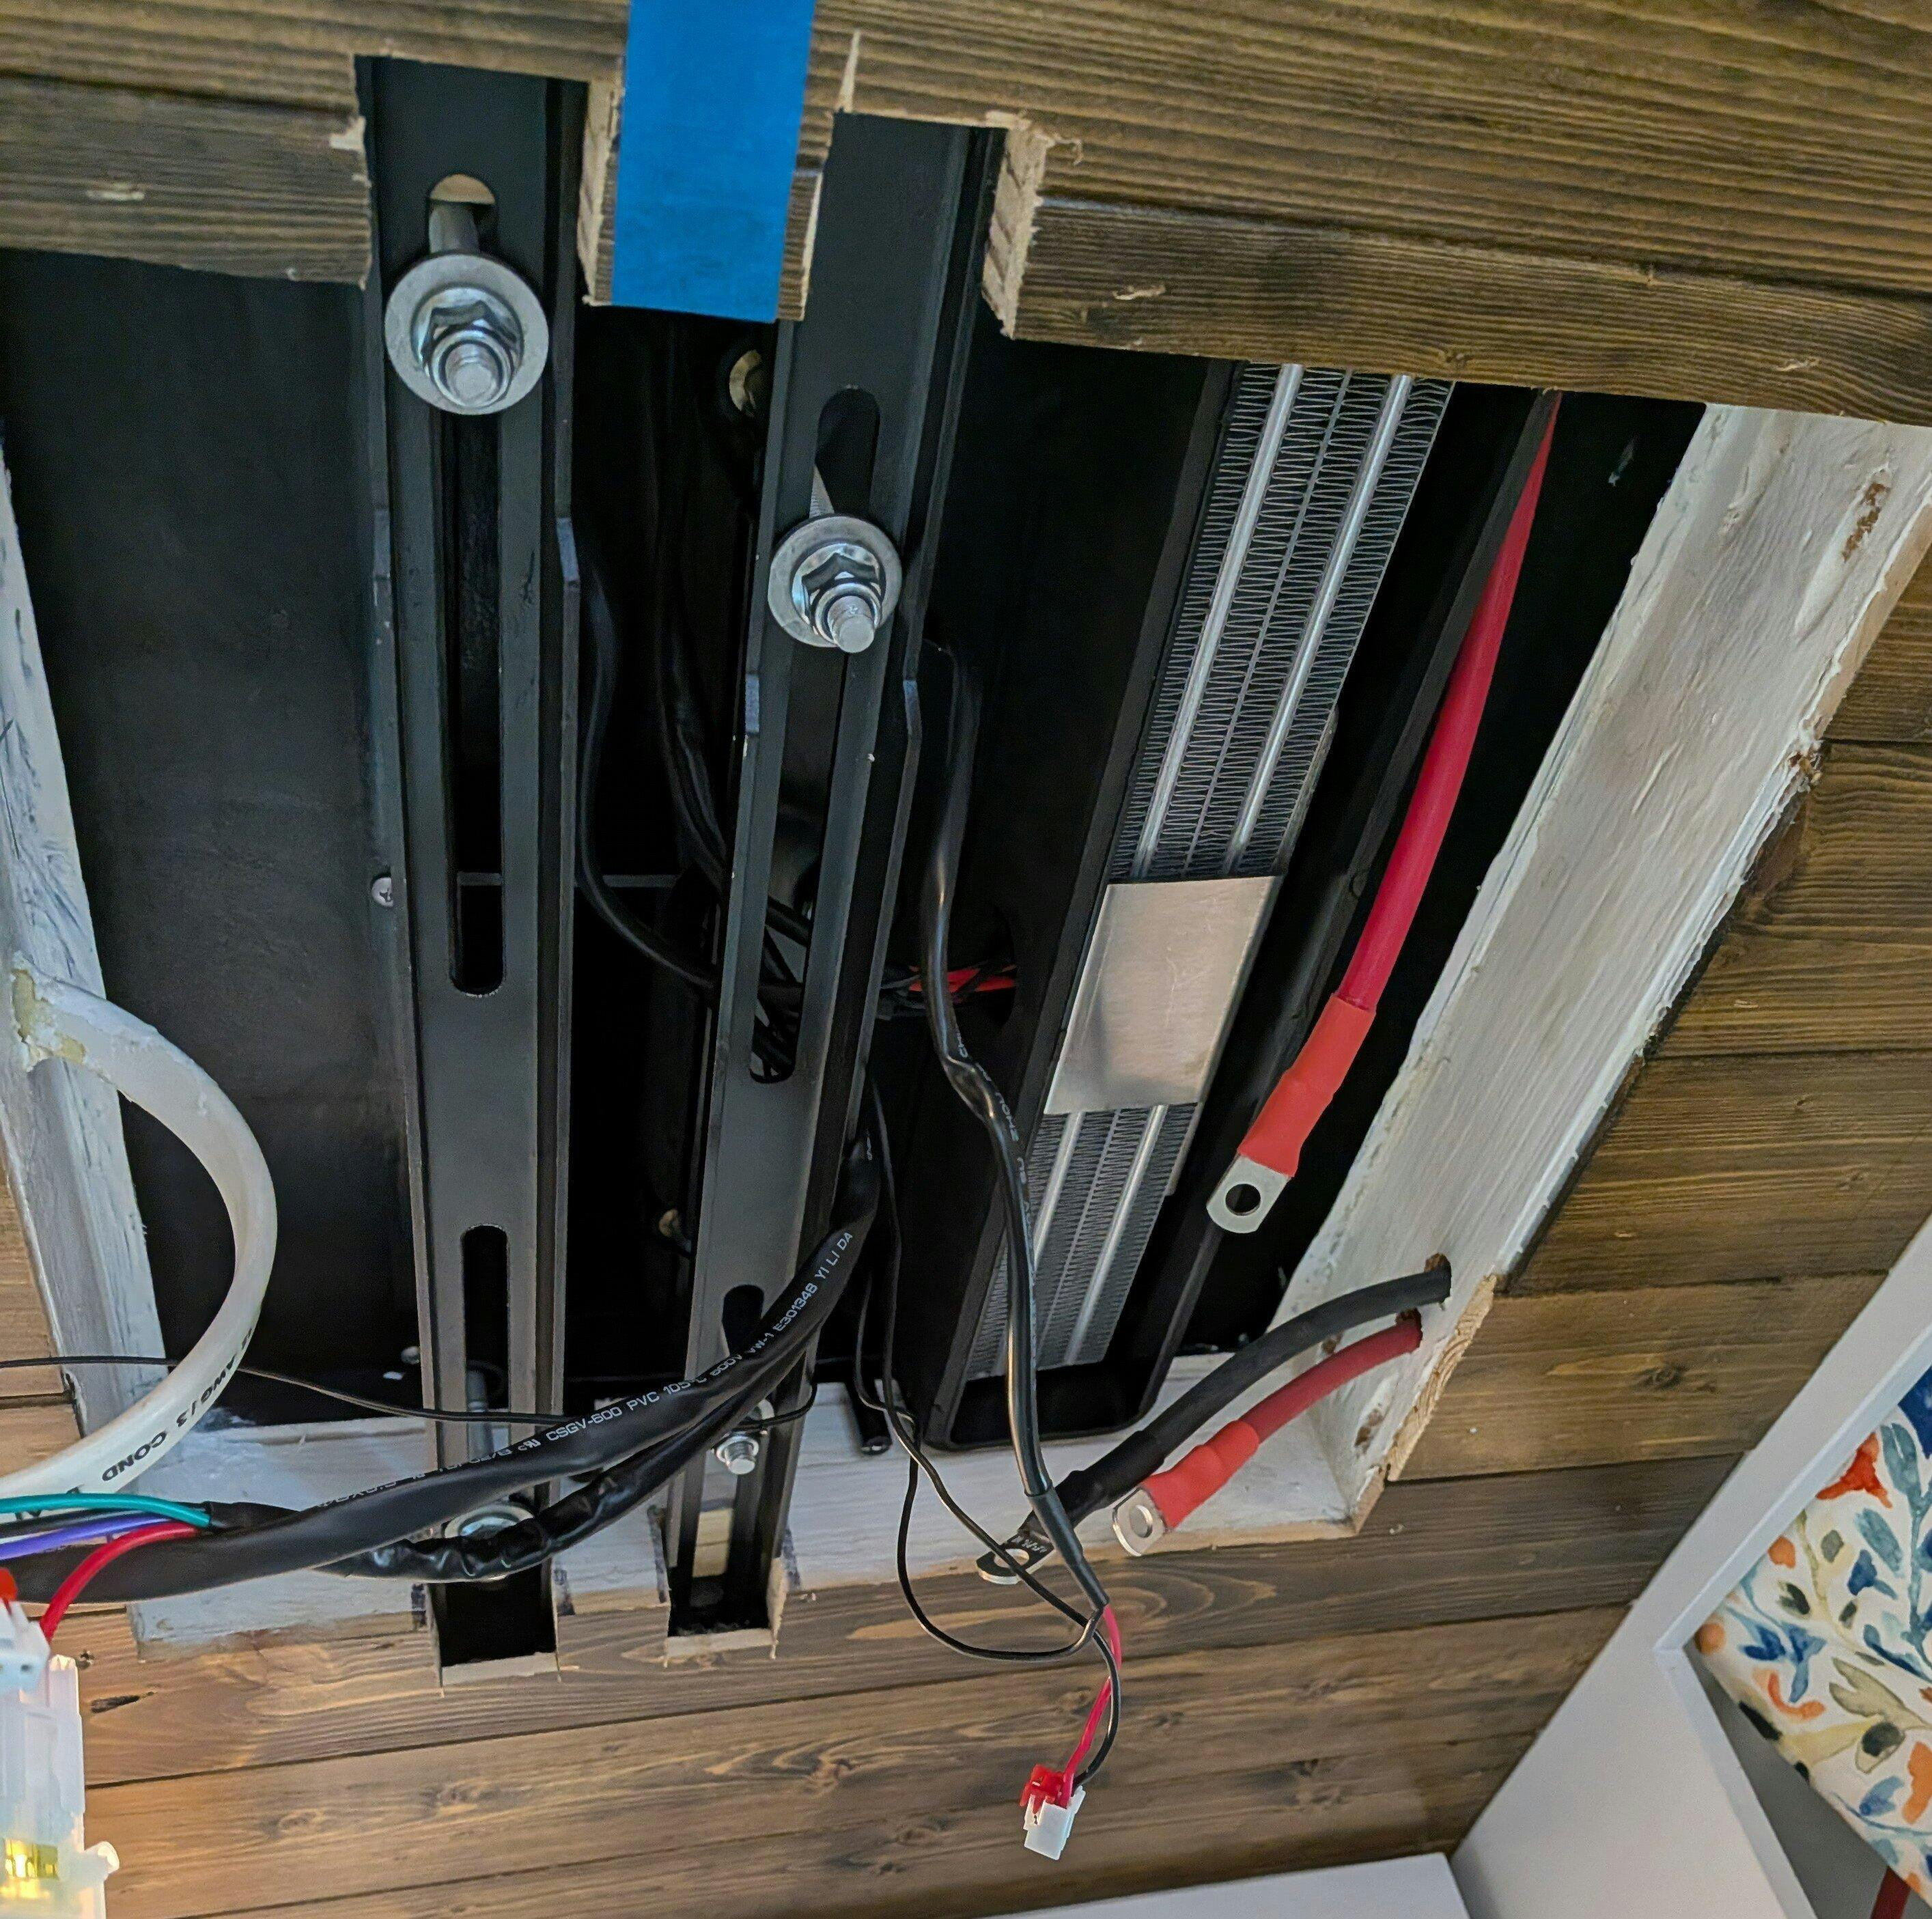
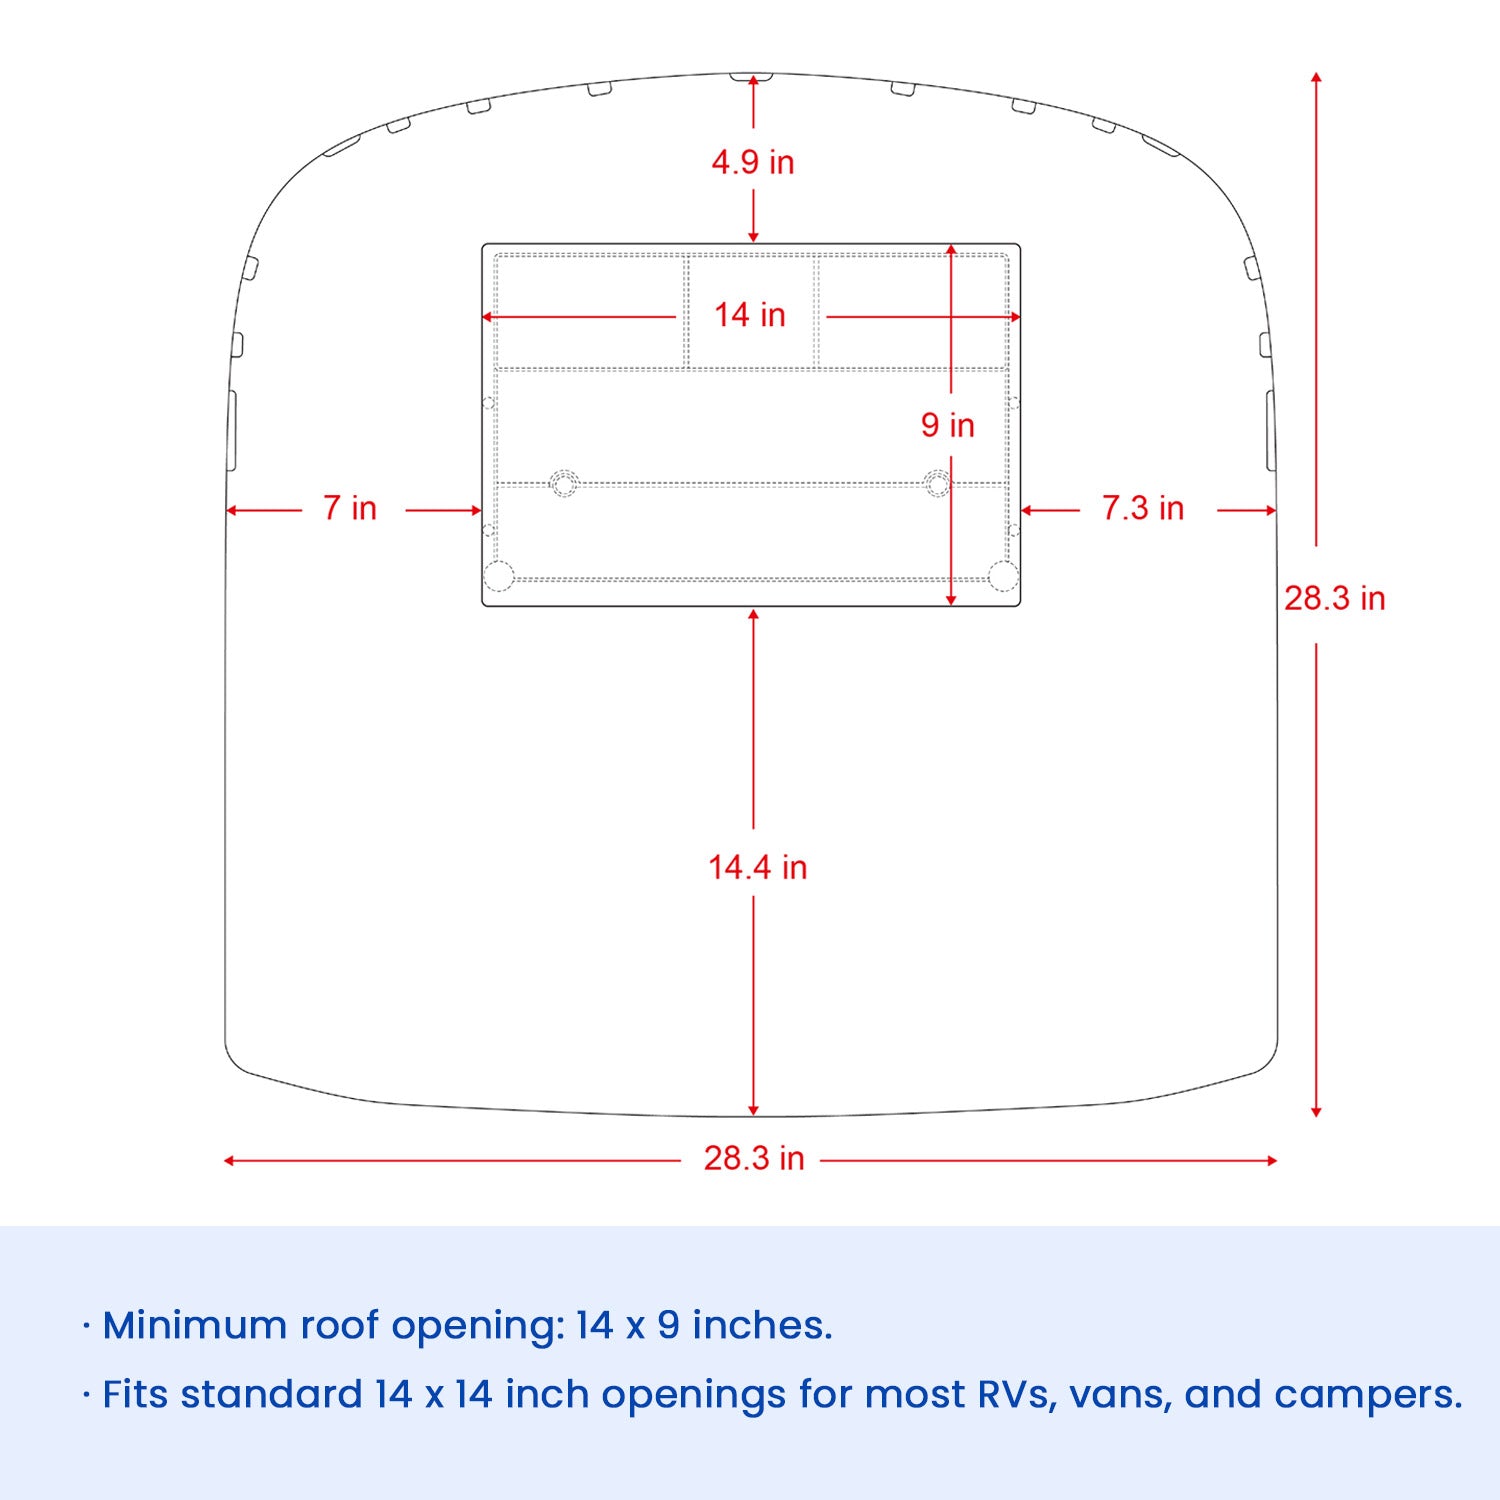
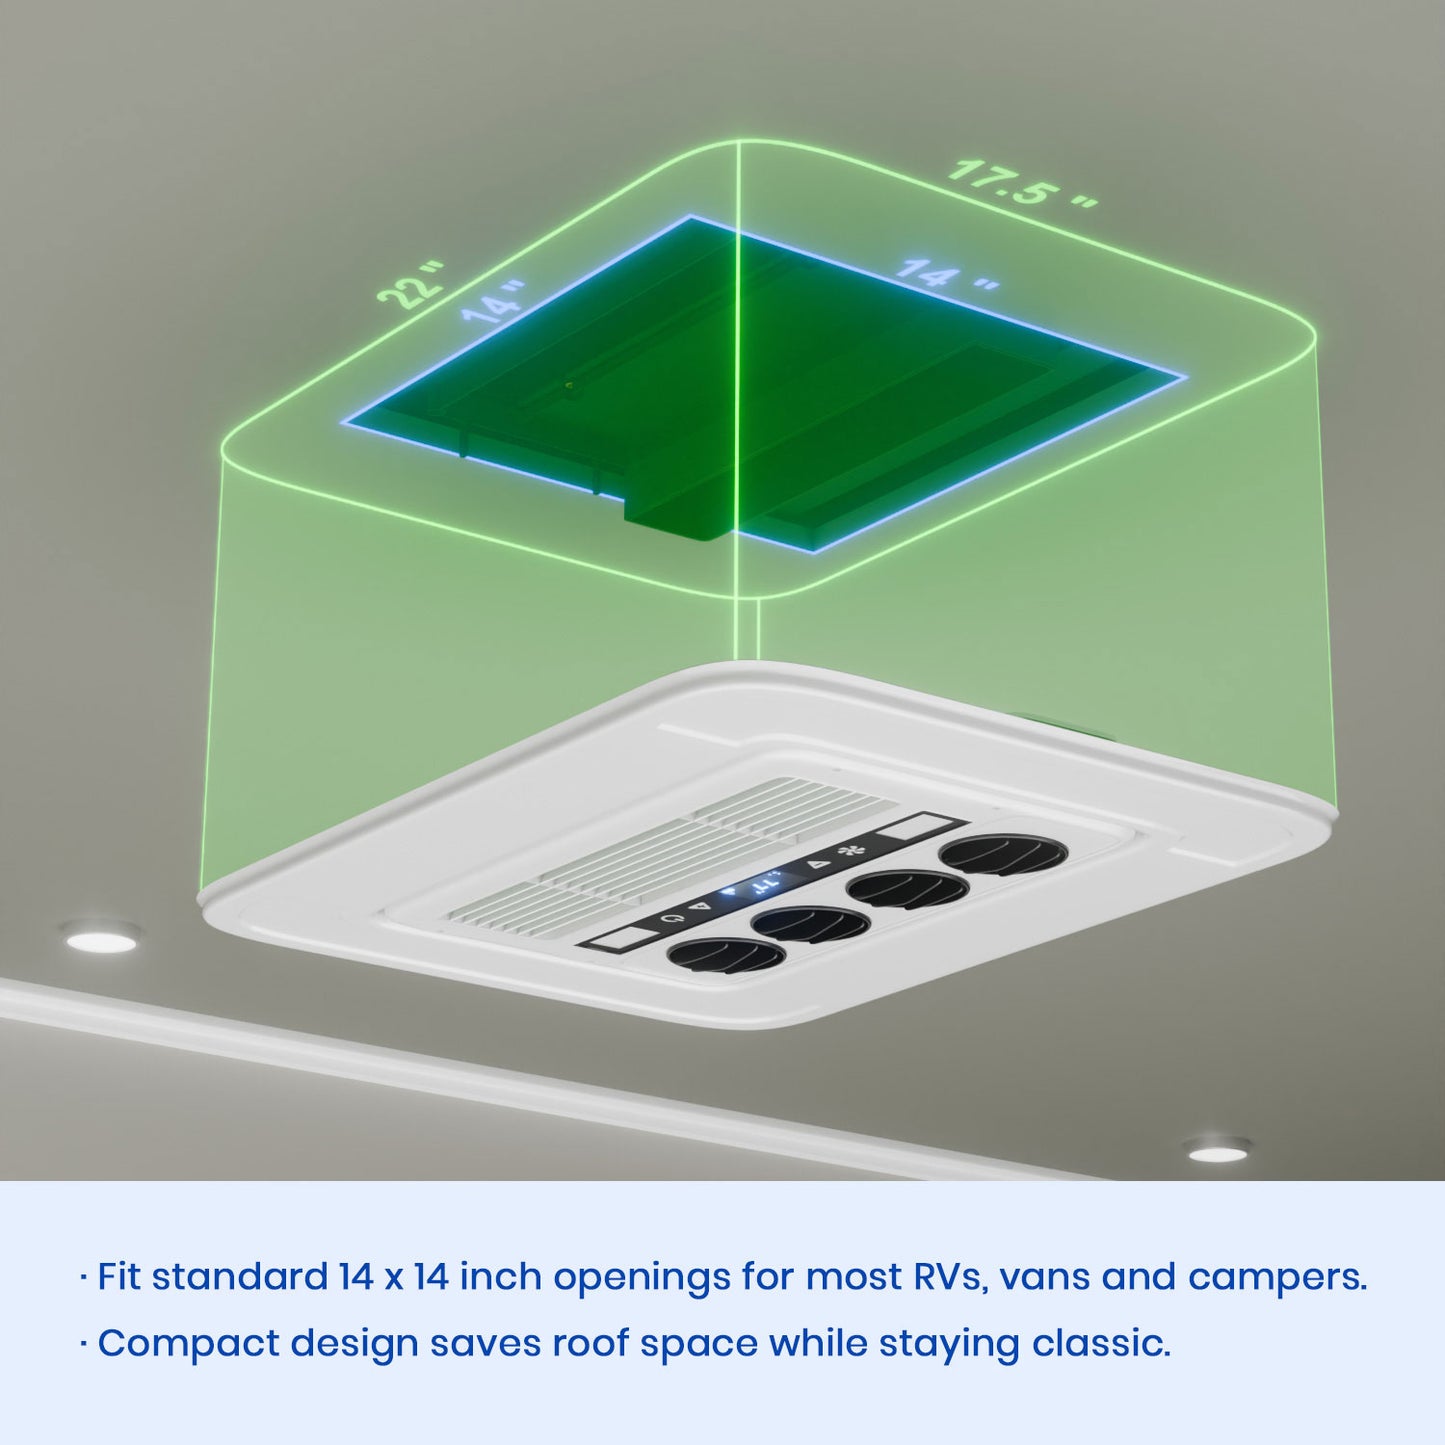
My hole near the front of the van is about 13.5 x 13.5, because the Coleman Mach 8 was not picky on an exact size. The OutEquipPro is. You will need to make sure the hole is 14" wide at a minimum for the threaded mounting bolts to fit. If my hole had been more like 14.5" wide, I could have used different threaded holes to spread the mounting brackets further apart.... maybe on WanderVan 2.
The unit comes with 6 gauge wire attached, no Anderson connector is on it anymore. With the optional heat unit, replacing the supply wire from the unit is not as easy. I opted to cut the 6 gauge leads shorter, see pics, and add connection studs in the 14x14 cavity. This let me connect with 4 gauge wire for the rest of the run to my electrical area. I was trying to reduce voltage drop at the max of 60 amps it may pull.
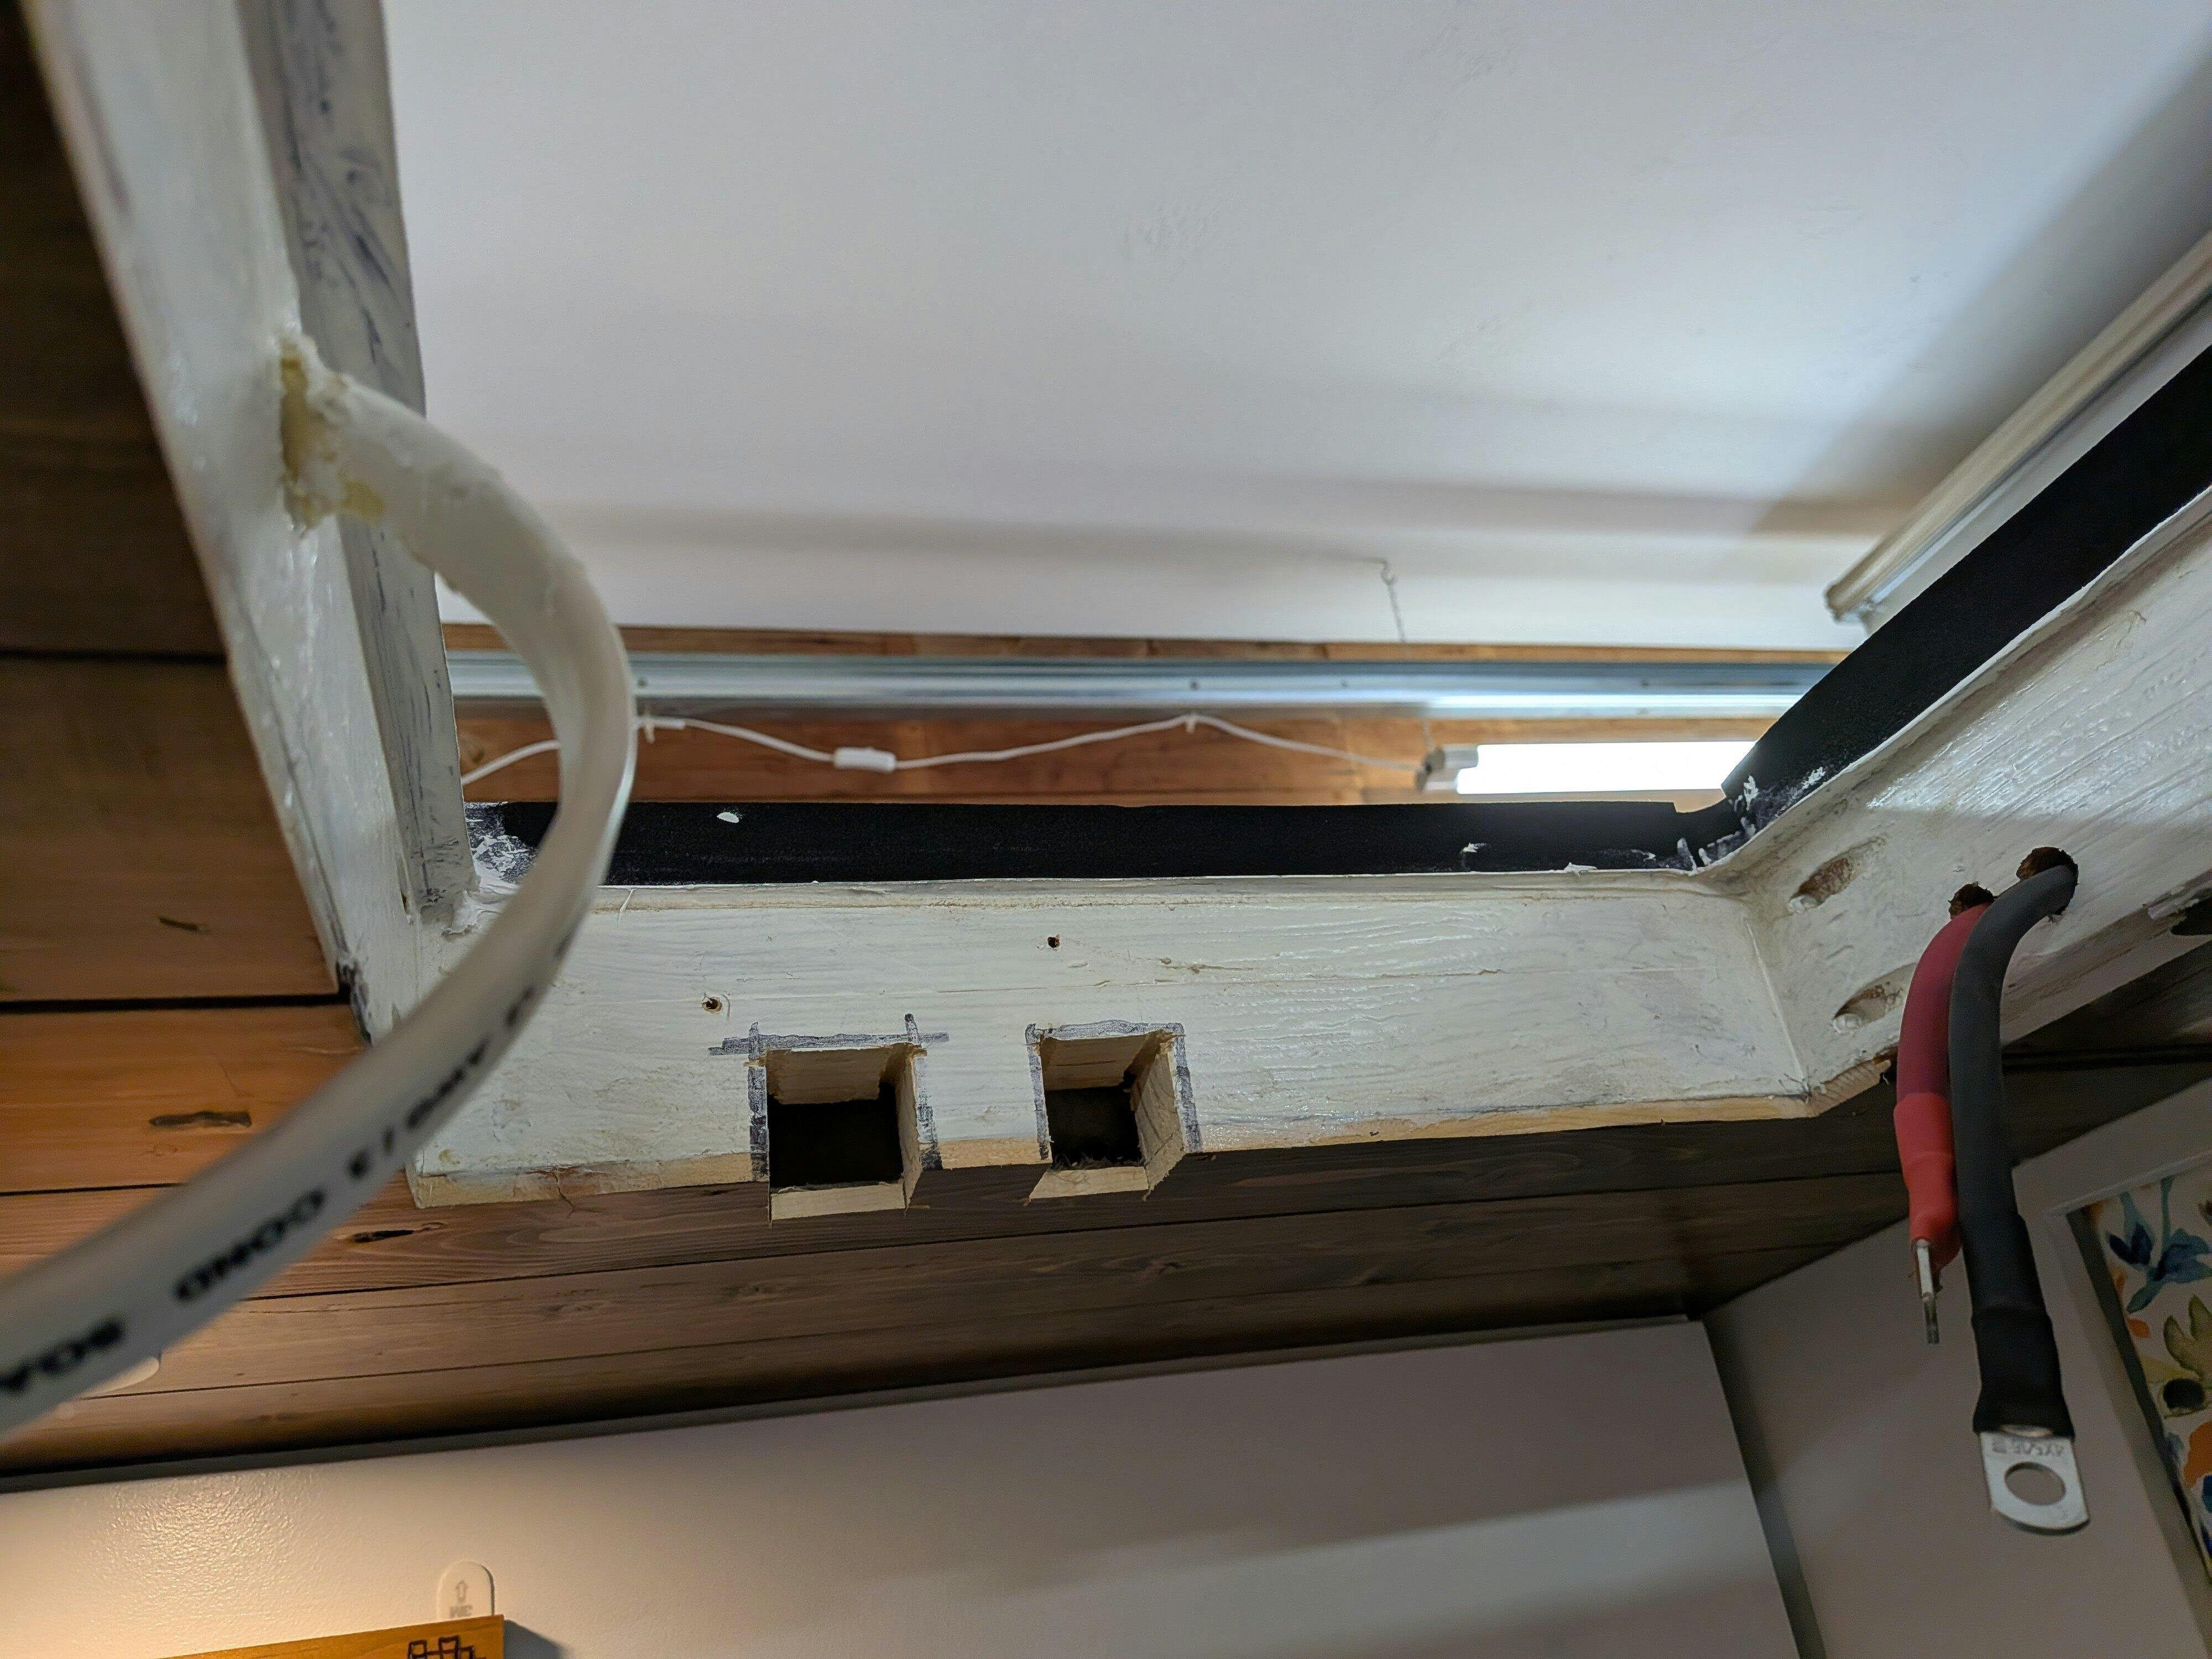
My roof thickness is about 4" total, from the top metal skin to the bottom of my finished ceiling. This is really too thick for the included threaded rods. I also wanted to keep the brackets recessed so that the control panel would fit flush to my ceiling. I used an oscillating tool to cut notches in my wood framing to recess the brackets.
I cut down the gasket, and stuck it to my roof about 1/4" outside of my opening hole. I caulked the edge where the gasket meets the van roof with a compatible Henrys caulk, since I have Henrys Tropi-Cool on the roof. Once the unit was up top, I move it back nearly as far as it could go, and this gave me about 2.5" of space in front of the cool air duct. I ran the wiring protective loom along the underside of the unit, then through the top edge of the gasket. This allowed it to come in the 14x14 opening and eliminate the need for a separate wiring hole. I did need to shim the back edges of the unit, supported by the included foam, to try to keep it more level. I cut my foam pieces into shorter pieces that would align with the high ribs on the van roof.
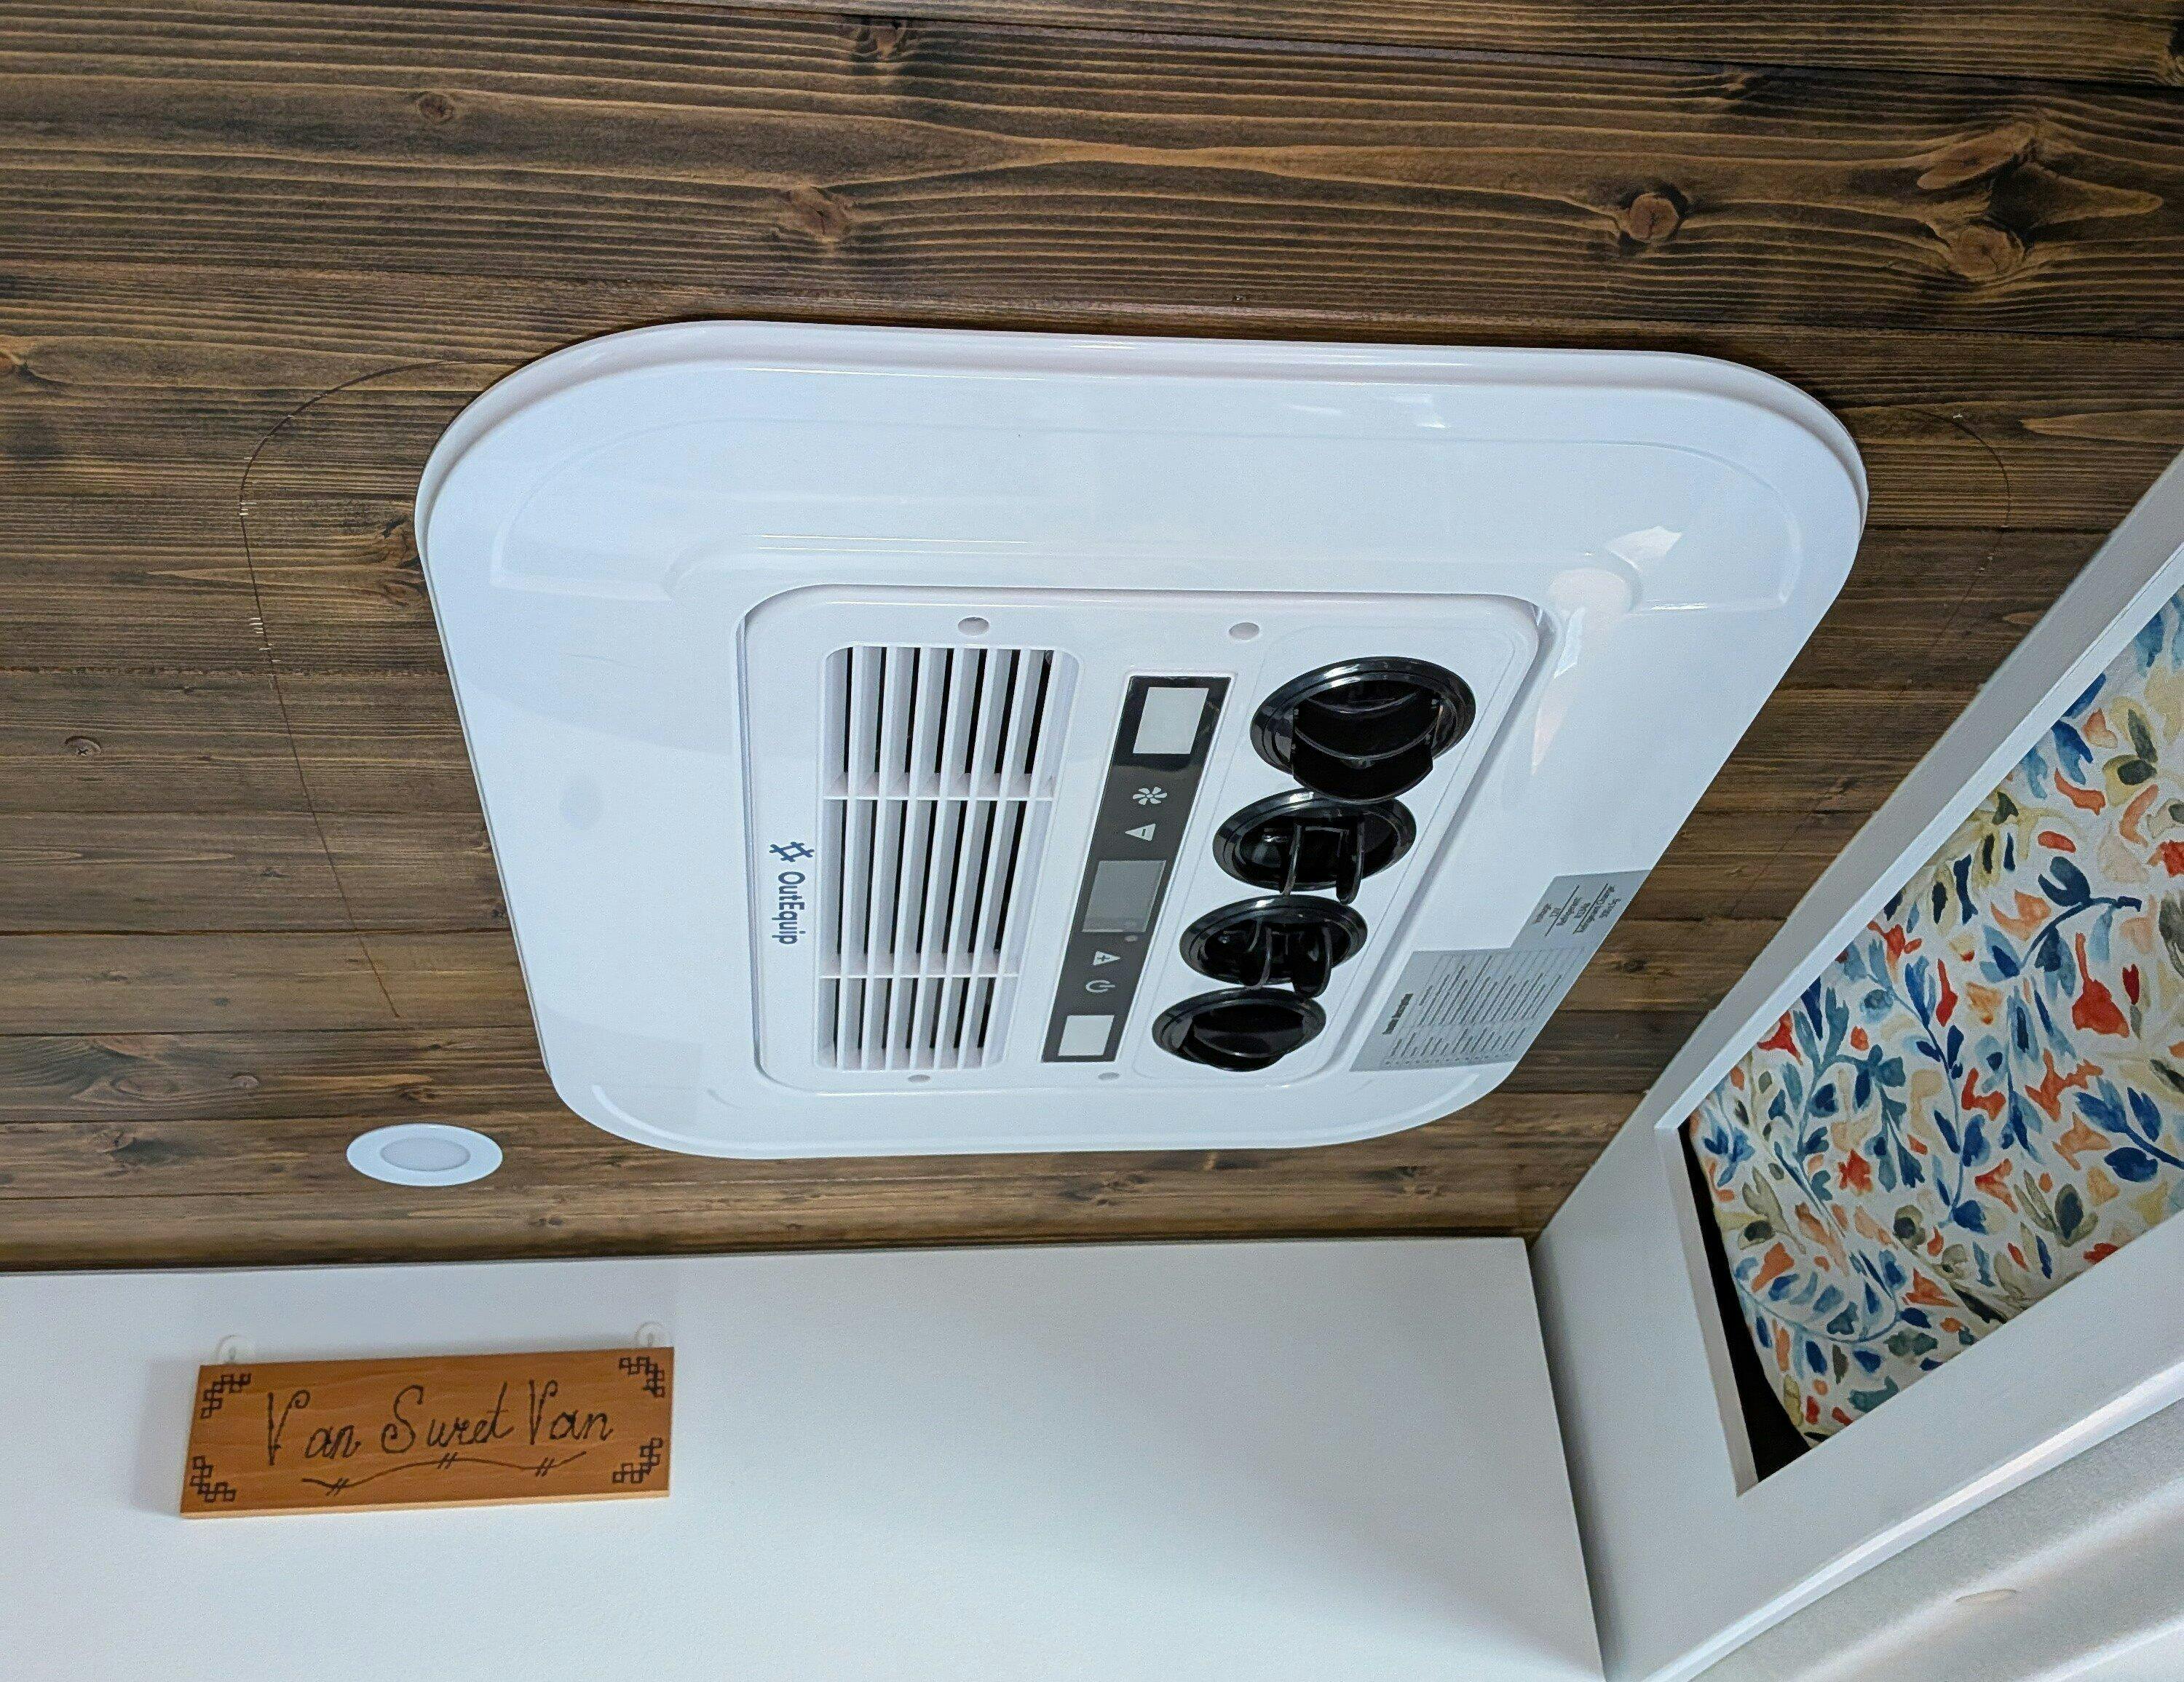
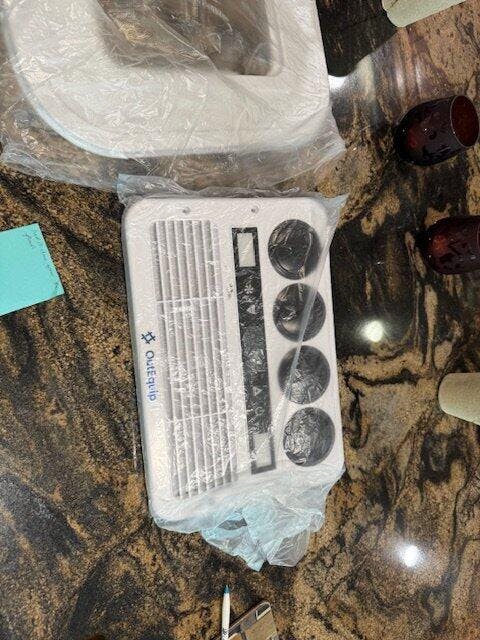
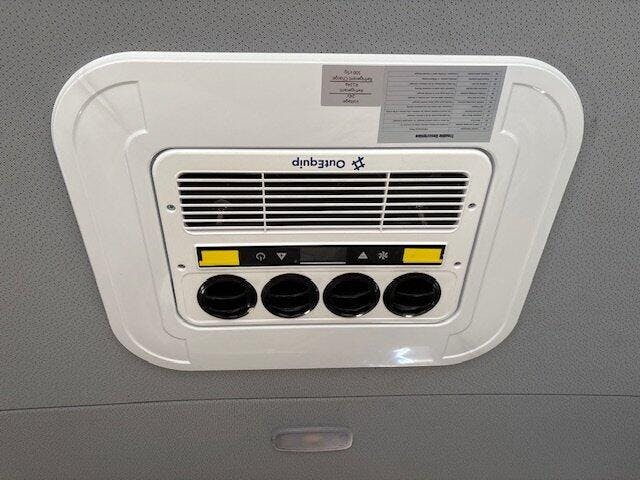
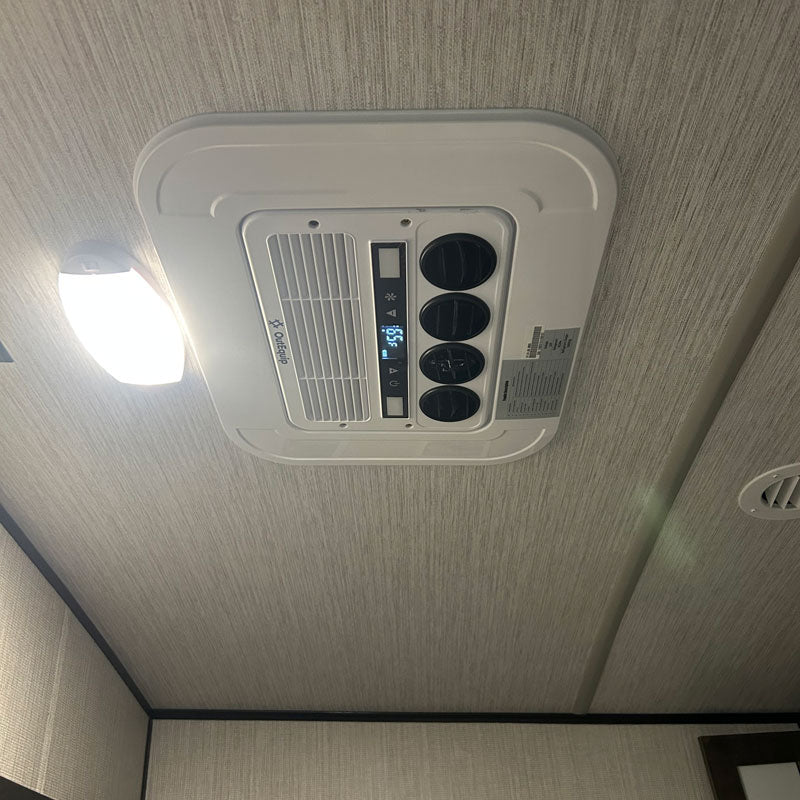
The interior panel fit flush to my ceiling, since the brackets were recessed into the wood framing. The interior control panel is thinner than the old Coleman unit, so I am less likely to hit my head on it. It took a few hours, but by taking my time, it was not too much of a chore.
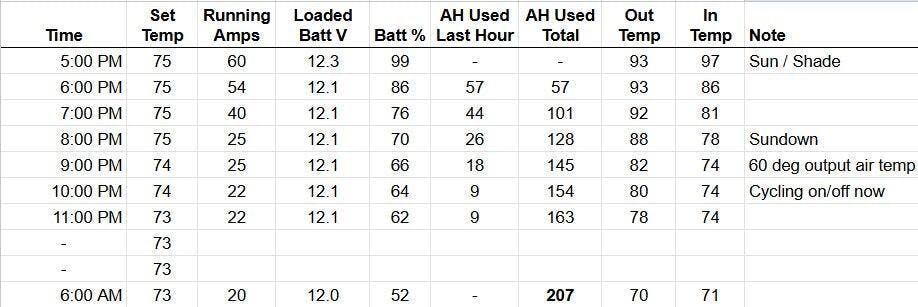
I currently have 4 x 6volt golf car batteries with a capacity of 440 AH. This would give a 50% capacity of 220 AH, so I was interested in how the power usage ran. I pulled the van outside and left it for the day. About 5PM, I went in and started the air conditioner. The inside of the van was 97 F. Although we typically drive some during the day and then try to be stopped by 5 PM, in a real type of use, the interior would not be that hot. You can see the details in the chart, but basically, on a 95 F day, running from 5 PM until morning, it used about 210 AH from my batteries. I tested with everything else off, included solar charging. This aligns with what I had read elsewhere online, but I was glad to see it for myself. This was basically all of my battery capacity, but the test will let me plan my lithium battery upgrade. I also plan to add some solar (from my current 300W to 400W) with the extra roof space available. I will also upgrade my alternator charging, since in total I will need a way to replace the 250 AH used by the AC and other electrical items each day. We normally start driving each morning for part of most days, so I don't need the AC to run off grid for multiple days on end.
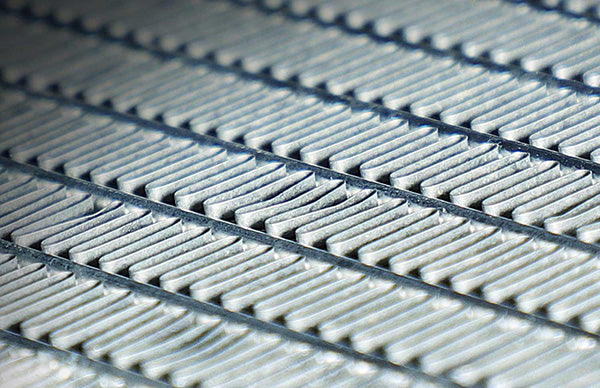
All in all, I believe the unit should work well for our normal use. I am interested to see how the heat function works and how much power is used as we get into the winter season. One downside is that this unit does not have an integrated air filter. I plan to install a washable one on the outside of the interior panel that attached with some small velcro tabs.
If we build another van, this will help me determine what will work best for us. A heat pump unit with more efficient would likely be a nice option.
I hope this info is useful to others considering this option. Happy Trails... Shawn
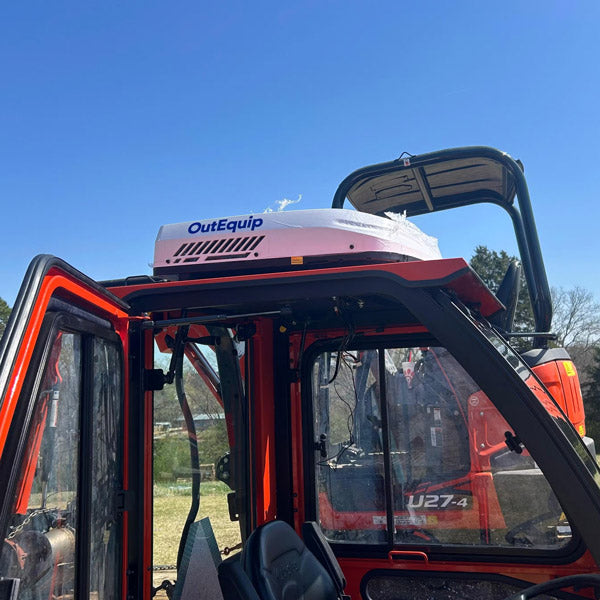
OutEquipPro is the best! They were extremely helpful, supportive, and answered all my questions during the process. I am attaching the photos of the installation and how it appears. In my experience, it was very similar to mounting a ceiling fan in an RV or a camper. The unit seems very robust, and I am delighted with the quality of the construction. Now I just need some extremely warm days!
Nice unit , works awesome
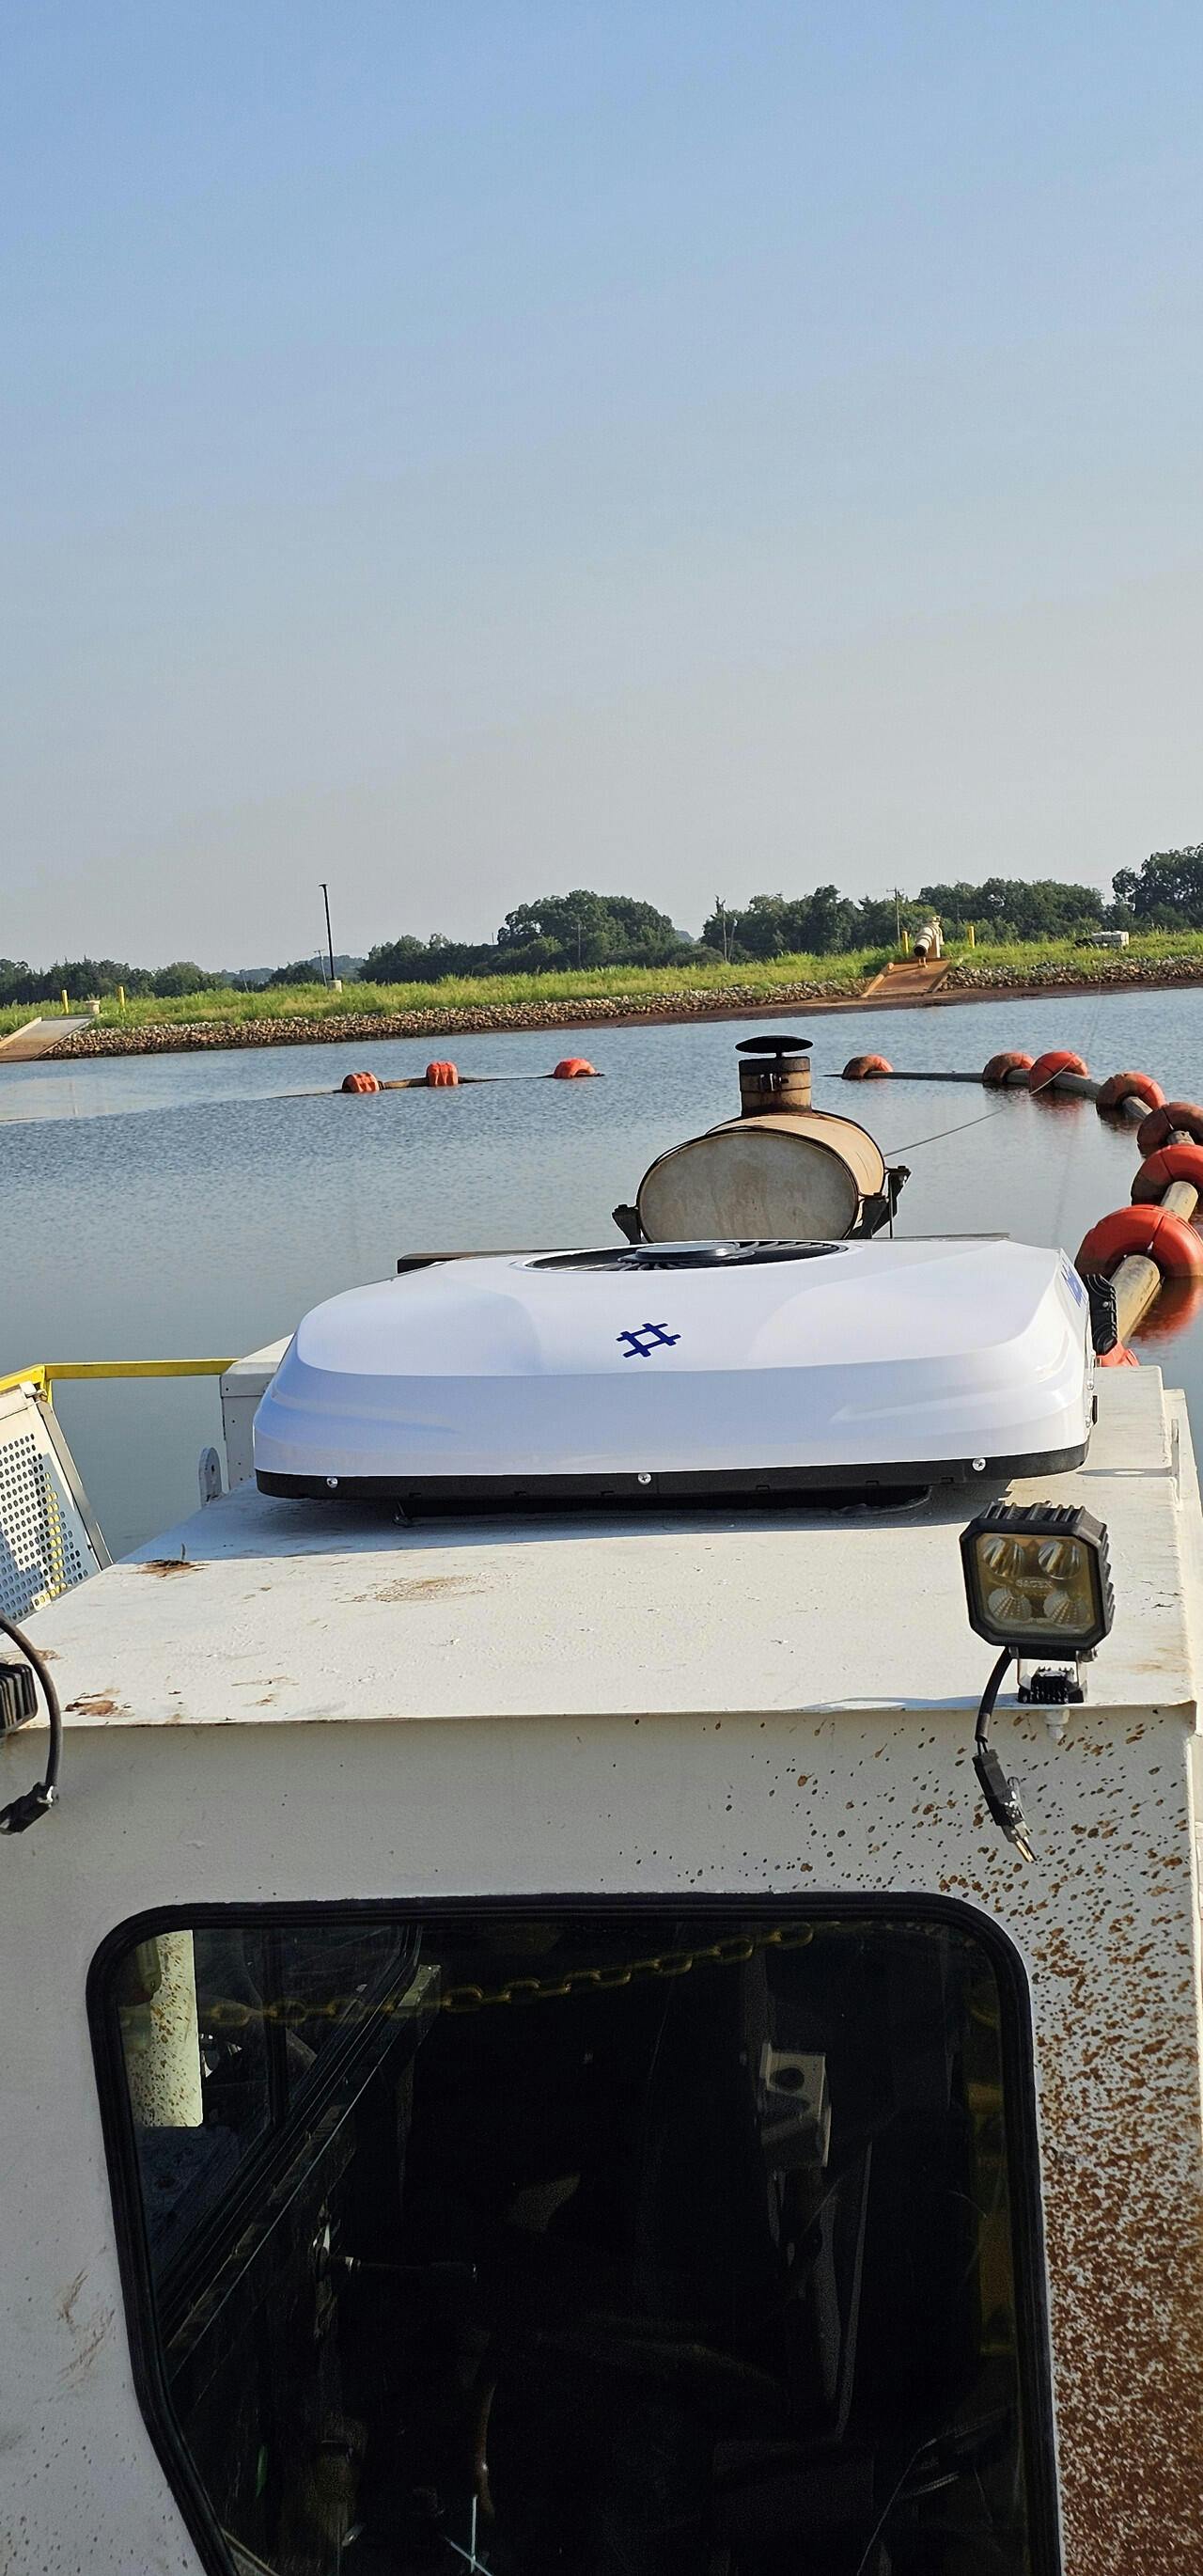
We removed the Maxx fan from our 2016 Sprinter 170” and replaced it without OutEquip 24v ac. Below is the finished installation that is free of leaks and energy efficient.
This is how the interior looked before installing the flange.
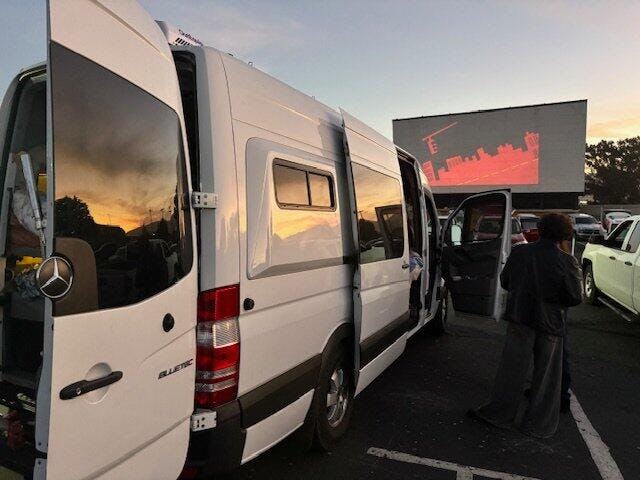
Enjoying a drive-in movie on our first trip with the AC.
My existing hole 14“ x 14“ with custom spacer.
Purchased 14 x 14 foam off Amazon
Put this plastic whiteboard underneath to add Support.
Whiteboard in its final location.
Used a C clamp to hold the pieces in place and screwed it together.
My solar system. With cover removed from AC attempting to run wire internally. Chose instead to run wire through Gromit with new hole.
Inside of van with stock headliner and yellow tape to improve color temperature on lights.
70 amp breaker installed upstream of stock fuse.
Happy with our new AC and grateful to OutEquip for tech-support.
Cheers, Charlie